
Wuthering Waves‘ puzzles range from straightforward and simplistic to intricate, multi-step challenges. During your travels, you may accidentally stumble upon a Guide Crystal or its chest location, with no clear indicators of how to complete the entire process. Here’s how to complete both Guide Crystal puzzles and where to use them afterward.
How to find the Guide Crystal puzzles in Wuthering Waves
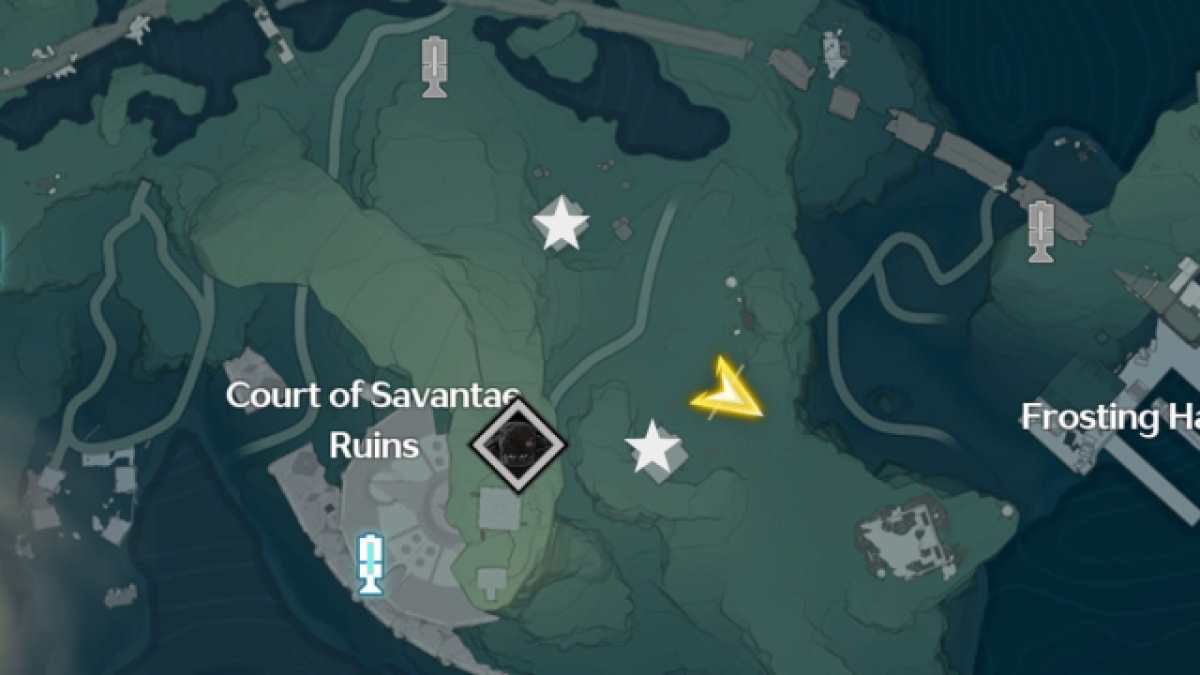
Wuthering Waves features two Guide Crystal puzzle sequences in Whining Aix’s Mire. The first is directly north of the Court of Savantae Ruins, while the second is directly east.
Upon approaching the north Guide Crystal location, you’ll find the following:
- Six pressure platforms surrounding a puzzle cube
- Two additional pressure plates near a locked cube
- A closed door
Each pressure plate corresponds to various parts of the puzzle, and you’ll need to use your character and both cubes to unlock a door to your first crystal.
Similarly, you’ll find the following at the eastern Guide Crystal puzzle area:
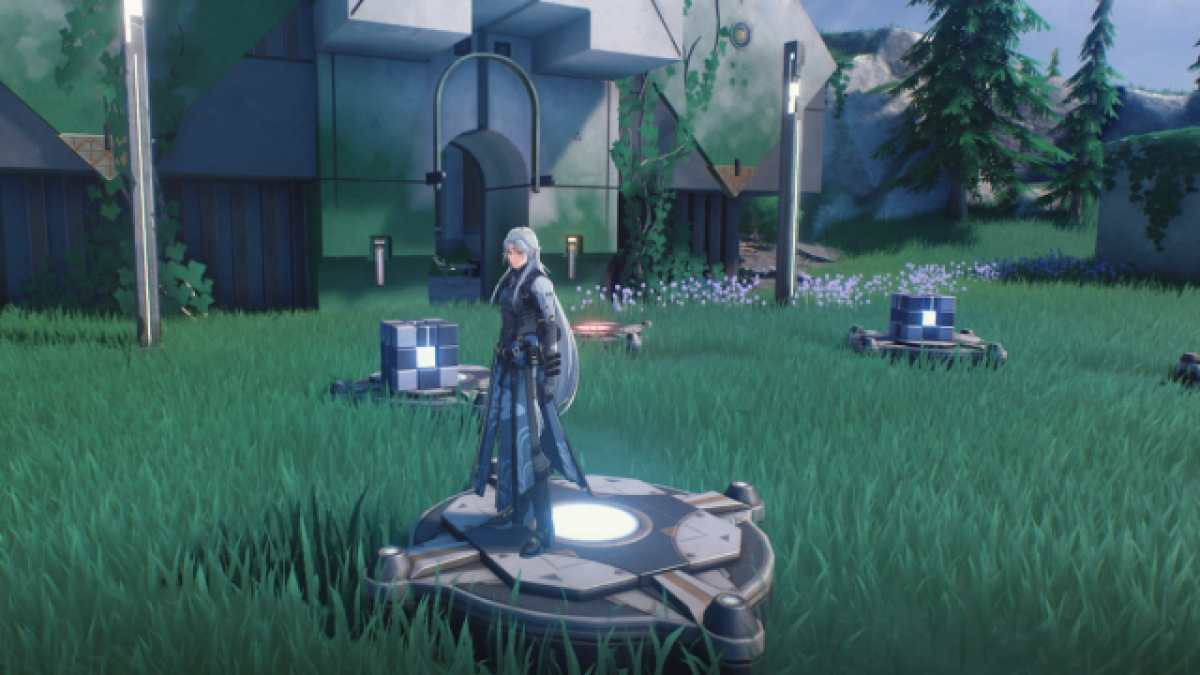
- An Energy Matrix puzzle in front of a locked door
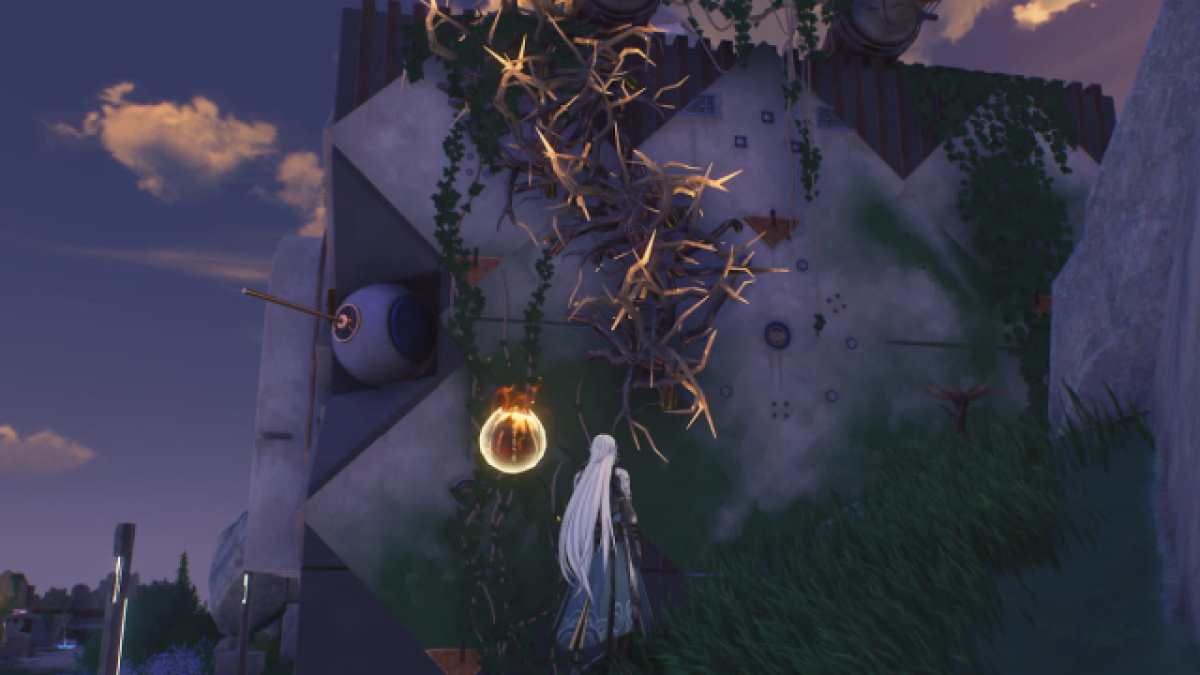
- Vine thorns and an explosive charge directly west of the door
- Exiles guarding the area
Finishing this puzzle and finding your second crystal requires defeating the Exiles, clearing away the thorns, and using the nearby energy pieces to complete the matrix. Doing this unlocks another door to your second crystal.
First Guide Crystal puzzle solution in Wuthering Waves
Starting from the Guide Crystal puzzle north of the Court of Savantae Ruins, you’ll take the exact steps listed below to solve it:
- Start next to the center cube and look at the locked door. Use Levitator to drop the center cube onto the platform before you, closest to the locked door.
- From the center, stand on the plate to your right to unlock the locked cube.
- Drop the now unlocked cube on the pressure plate to the right of the first cube.
- Take the first cube and drop it on the pressure plate to it’s left.
- Stand on the plate next to the one from step four.
Your first step involves using Levitator to bring the puzzle cube onto your first pressure platform, followed by stepping on one to unlock a second cube. Your camera will pan to the cube unlocking, indicating you picked the right spots.
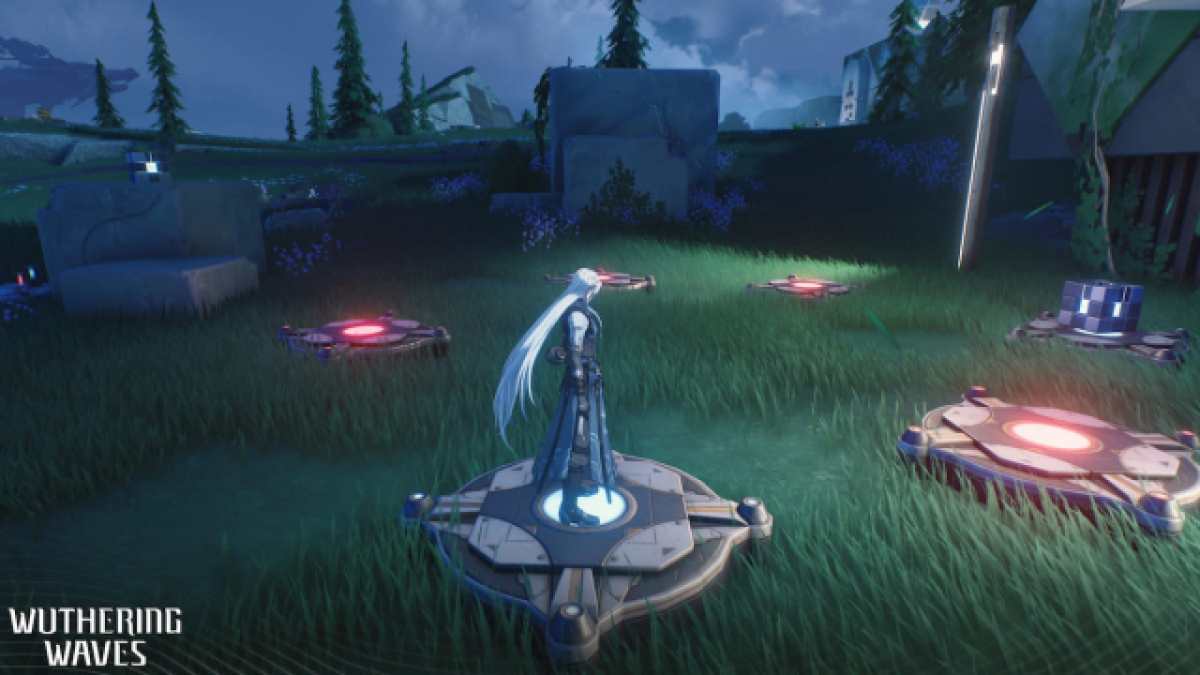
Next, you’ll place both cubes on their respective platforms before standing on the last one. Like before, your camera will pan to the door, showing you picked the right locations for everything.
Once you place both cubes on the plates and stand on the third, you’ll open the locked door, revealing an advanced supply chest and the first Guide Crystal. Pick it up before heading to the eastern location.
Second Guide Crystal puzzle solution in Wuthering Waves
Next, we have the eastern Guide Crystal puzzle location. If this is your first time here, you’ll likely see a group of Exiles guarding the area. Eliminate them before taking the steps below to solve the puzzle:
- Take the explosive charge and throw it at the vine thorns to clear them away.
- Locate the four Energy Matrix pieces and arrange them in the circle.
The first thing you’ll do after defeating the exiles at the puzzle location is use the nearby Explosive Charge to deal with the vine thorns. One of the Energy Matrix pieces is caught under these thorns, so you’ll need to burn them before starting.
Once you clear away the thorns, you’ll need to get your hands on four Energy Matrix puzzle pieces. You’ll find two in front of the Energy Matrix, one directly left of the door, guarded by some exiles, and one northwest of the puzzle next to a stone block.
After gathering all four pieces, your goal is to cover every blue circle with the pieces. You can use the outer edges to help fit each piece in, but you’re not required to fill them all in. Below is the completed puzzle:
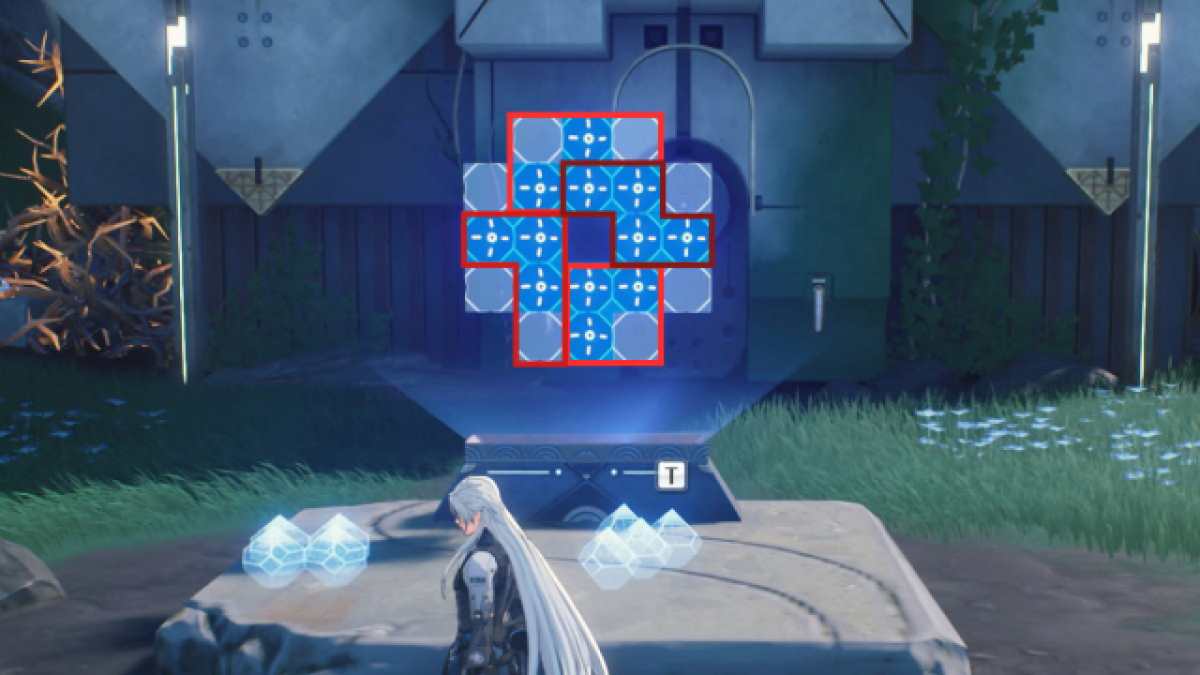
With all four Energy Matrix pieces in place, the door will open, revealing the second Guide Crystal.
How to use Guide Crystals in Wuthering Waves
Now that you have the two Guide Crystals, you can use them outside the Court of Savantae Ruins to uncover a hidden premium supply chest. To do this, head to the ruins before climbing the eastern cliffs until you find a large floating cube.
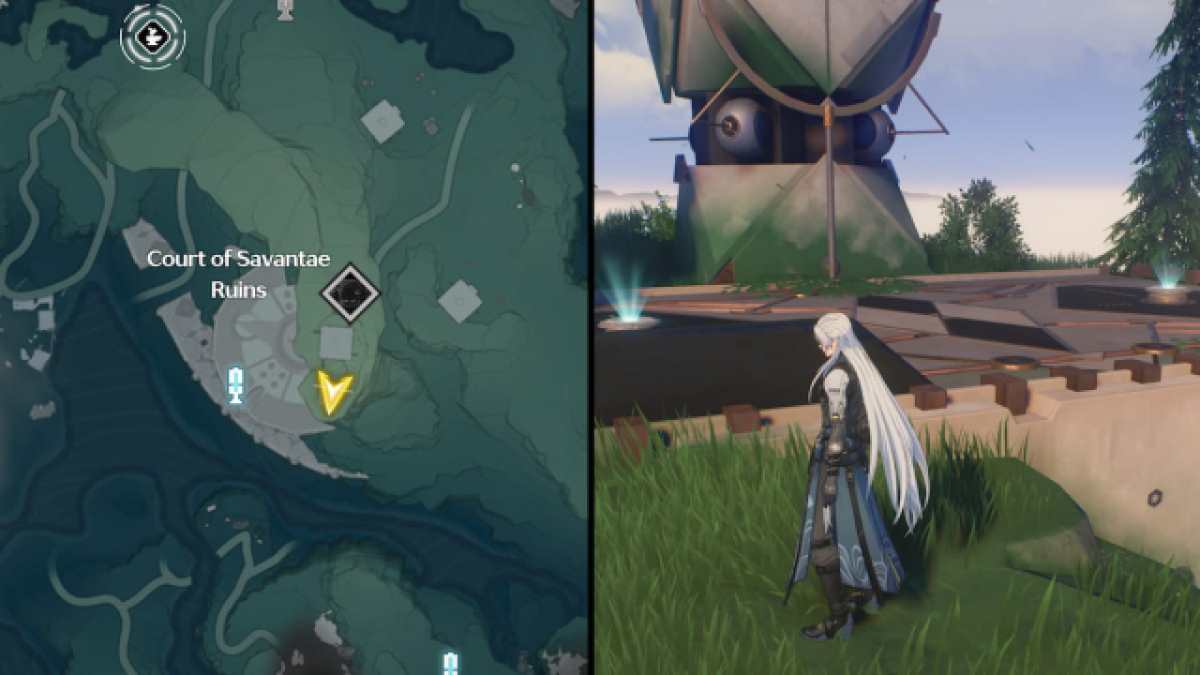
Near this cube, you’ll see two glowing spots where you can place your Guide Crystals to reveal the treasure chest. You’ll obtain Union EXP, Astrite, and Shell Credits for your troubles, which, considering the puzzles also had their treasures, is worth the effort.


Published: Jun 3, 2024 7:33 PM UTC