
Bouncing is life
Morok Shrine can be one of the more frustrating shrines in The Legend of Zelda: Tears of the Kingdom. Even from the start, it isn’t immediately obvious how to get through each section. Still, it can be completed with just the basic abilities that Link learns from the tutorial so anyone can knock this one off from the start of the game. Let’s take a look at how to complete Morok Shrine. But first, where is it?
How to find Morok Shrine in Tears of the Kingdom
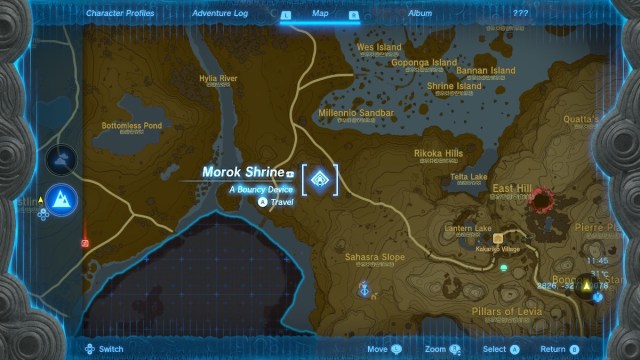
Morok Shrine is located northwest of the Sahasra Slope Tower. If you’re starting in Lookout Landing, you need to head southeast. You’ll get to Morok Shrine just after crossing the Hylia River. It’s a fair trek on foot, so this might be one of the shrines you come across a little later in the game. Check the map above for the exact location.
How to complete Morok Shrine
Morok Shrine is another of the shrines in Tears of the Kingdom that only requires the Ultrahand ability to complete. If you’ve completed a lot of shrines at this point, you may have noticed how vital Ultrahand really is. Morok Shrine is all about getting up to the next platform level, which is far too high to jump and cannot be climbed.
Upon entering the shrine, you need to stand on the first platform that shoots Link into the air automatically. The second platform is where you need to start thinking for yourself. The bounce box next to the wall is already in the right location, but it doesn’t activate on its own. To activate this box and all the others from here on out, you need to strike them with a melee weapon. Stand on the box and hit it to activate the spring. This will shoot Link up to the next platform.
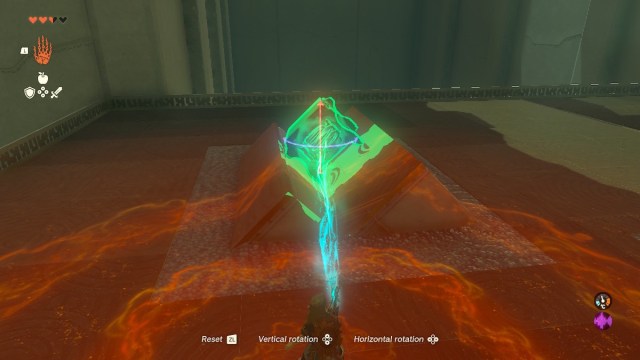
Now it gets a little more complicated. You’ll need to move the boxes around using Ultrahand to place them in the correct spots. When you’re on the platform with the hole for the ball, move the bounce box to the location shown in the image above. This will allow Link to cross the huge gap between platforms. Stand on the box again and hit it to cross the chasm.

Once you get to the other side, you need to send the ball back. Place the bounce box in a similar position as the last platform, just like in the image above. Once that’s in place, use Ultrahand to put the ball on top of it, but do not attach it. Make sure you’re standing close to the box when the ball goes on top. It will roll off quite quickly, so you need to strike the box immediately to send the ball to the previous platform. When the ball is gone, strike the bounce box again to reset it and then once again to send Link back across.
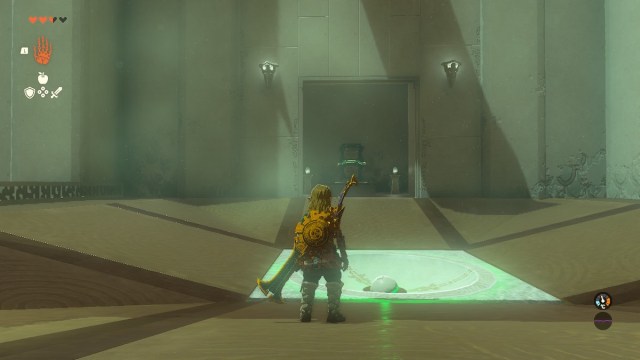
Now you need to place the ball within the hole to open the gate where there are two more bounce boxes. This time, they’re attached, which makes them more powerful and able to send Link higher into the air. Take the boxes out of the small room and place them on the white marker by the wall.
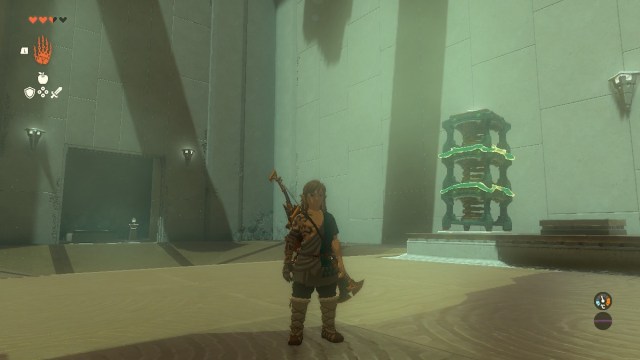
Use Ultrahand to attach the two new boxes to the third box that was already on this platform. If they’re connected properly, they should have the green glue all the way around, like in the picture above. If the green glue doesn’t go all the way around, the boxes won’t work correctly to provide more power when used. Now you can use the three attached boxes in the same way as the single boxes, just hit them to send Link flying.

However, before finishing the shrine, there’s a chest to collect. The three bounce boxes will send Link high enough to reach the final platform, but just below that platform is a chest containing a Sneaky Elixir. It’s not the best reward in a shrine, but it’s worth collecting for the very little effort required. After you’ve opened the chest, drop back down to the three bounce boxes and go up again to reach the final platform.
That’s it! Morok Shrine is complete.


Published: May 15, 2023 07:30 am