
At long last, you’re near the end of the Crimson Fleet questline in Starfield. It’s been a journey filled with deceit, danger, and nasty little aliens biting your ankles deep in a frozen prison. If all goes well, then maybe the struggle will be worth it. Plus you’ll get the chance to make a decision that’ll change history. Before celebrating, you need to complete the Eye of the Storm mission in Starfield. It’s going to be a doozy.
Your first step is to return to the Key and speak with Delgado, who’s in a really terrible mood. Apparently, UC SysDef is preparing for an attack on the aging Key, and its leader is now in full-on panic mode. It’s now or never to recover Kryx’s Legacy. Hand off the Conduction Grid schematics taken from the previous mission and receive the first GalBank Data Core (more on that later). It’s about time for you to leave. But first, you need to prep your ship so it doesn’t get fried by the electromagnetic storm that is Bannoc IV.
Steps to complete the Eye of the Storm mission in Starfield
Prepare your ship
After Delgado charges off in a huff, speak with Jazz about retrofitting your ship. You need to slap the ComSpike and the Conduction Grid onto it before making the journey. Choose the option “Mind helping me with my ship?” followed by “I’d like to view and modify my ships” to get the parts installed. Once you’re in the ship editor menu, open up ‘Ship Builder’ and press the button or key to ‘Attach’ parts to an open spot. Scroll to the ‘Equipment’ menu and attach the ComSpike and Conduction Grid to your ship. If you don’t see the Equipment menu with the parts, there might be an issue with your current ship. This happened to me and I had to change my home ship to the Frontier to get it to work.

Meet with the commander and head to the planet
With your ship prepared, here are your next steps:
- Make your report to Commander Ikande and find out what’s going on with UC SysDef
- Head to planet Bannoc IV in the Bannoc star system
Once you make contact and dock with the Legacy, the Eye of the Storm mission can begin properly. And man, are you about to get some serious Event Horizon vibes? It becomes clear that you aren’t the first to visit the derelict ship, lit by flickering lights and hallways filled with wrecked battle robots. You should check out the open areas as best you can. There are a ton of materials, weapons, and ammunition to gather. Looking around will also offer a glimpse at what happened to the lost souls who were trapped aboard the vessel.
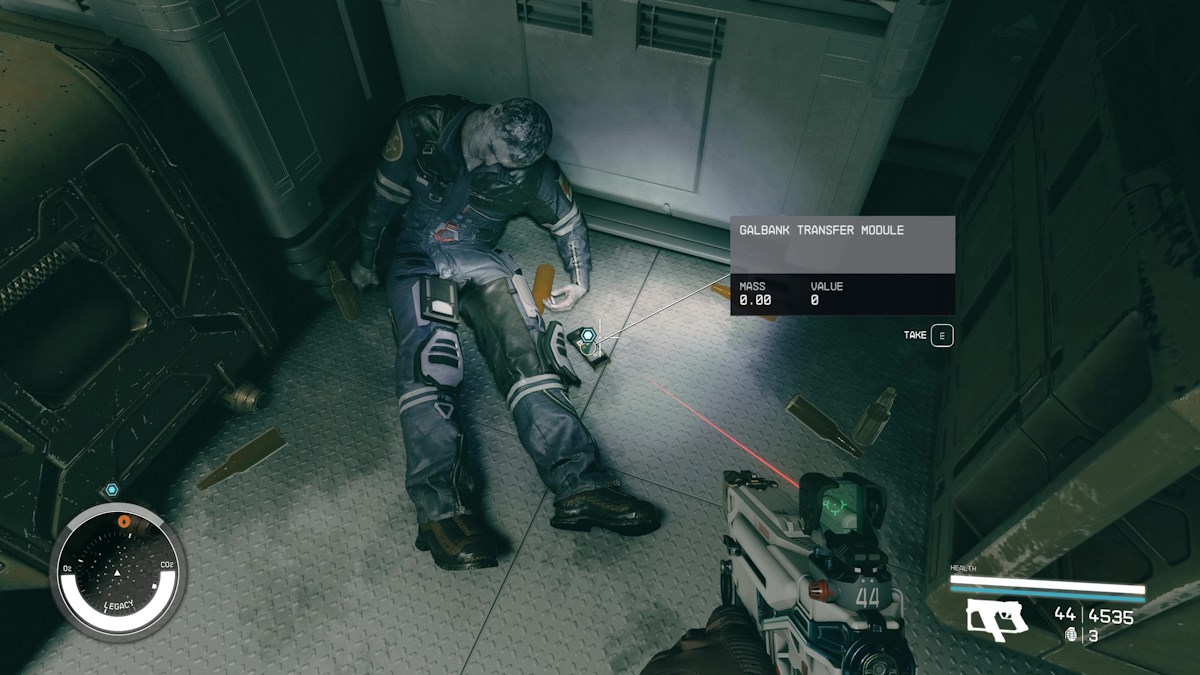
When you’re done gawking and looting, follow the navigation marker until you reach your first obstacle. You’ll run into a Transfer Module Lock, which requires a key to open a door that leads to the vault section of the ship. After hitting ‘activate’ on the lock, look behind you and grab the GalBank Transfer Module. That’ll get you inside.
Things are getting spicy
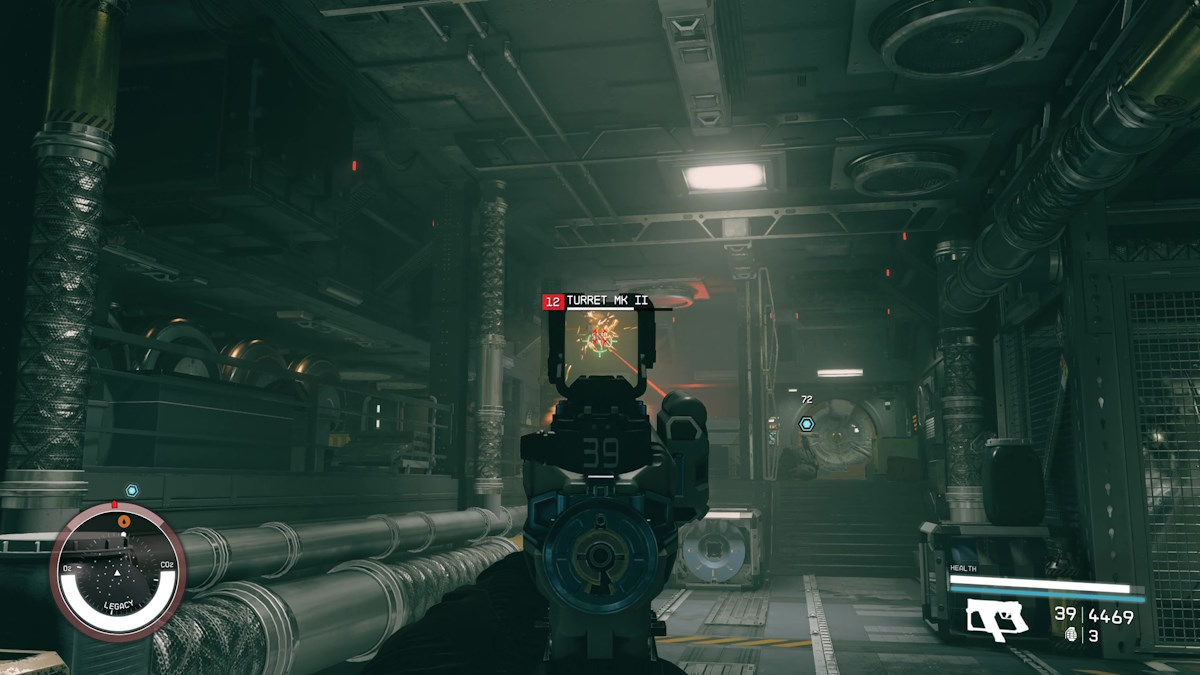
Walk into the vault section and head left toward Engineering. Go down the hallway, but be sure to make a pit stop at the Credtank and empty it of its loot. Who says you can’t get tipped for the job? In the next room, you have to face off against your first bit of opposition: a gun turret and a combat robot who comes at you like you owe it money.
Two ways to go: Now that Johnny 5 is no longer alive, you have a couple of choices on how to proceed. If you have at least one point in your Lockpicking skill, you can attempt to break into the Hydraulics room with the advanced-level lock. Otherwise, you need to go like Gimli and take the long way around through the Reactor, which is busy pumping out toxic fumes. There is a door with a master lock in the Reactor room. My lockpicking skill wasn’t high enough to break it, but I did spy a weapon and some ammo inside.
Stealth approach: The Eye of the Storm mission offers multiple gameplay options. If you fancy sneaky maneuvers, you should take the route through the reactor. Once you’re out of the door, crouch low and walk down the hallway. The computer terminal at the end of the hallway can shut down the robots. It has an advanced lock, so you need to spend at least one digipick.
Follow the marker until you reach a staircase with a battle robot to take out. Up the stairs is a door with an expert lock. Going through it allows you to take a shortcut. Otherwise, head left and go around. Ignore that first vault door you see; the computer panel can’t open it. You thought this was going to be easy? Eventually, you make it to the ship’s Engine Room.
Stealth approach: Look right as you walk through the Engine Room door. At the end of a walkway, you can see a door for the Control Room. If you have the skill to break an advanced lock and don’t want to mess with any bots, head into that room and pop a squat at the computer terminal. There, you can shut down the droids, turrets, and remote alarms. Otherwise, you need to go around and fight battle robots and turrets to get to the unlocked door. The computer terminal also has the key code to the safe on the wall behind you.
Kryx’s legacy and ultimate fate
Keep following the quest marker, which will take you through the massive vault. After dealing with some pesky droids, head through the door and make your way to the Vault Control room. It’s about time to finish this. Once inside the control room, you finally come face to face with the infamous Jasper Kryx. Well, what’s left of him: Apparently, he actually managed to find the Legacy.
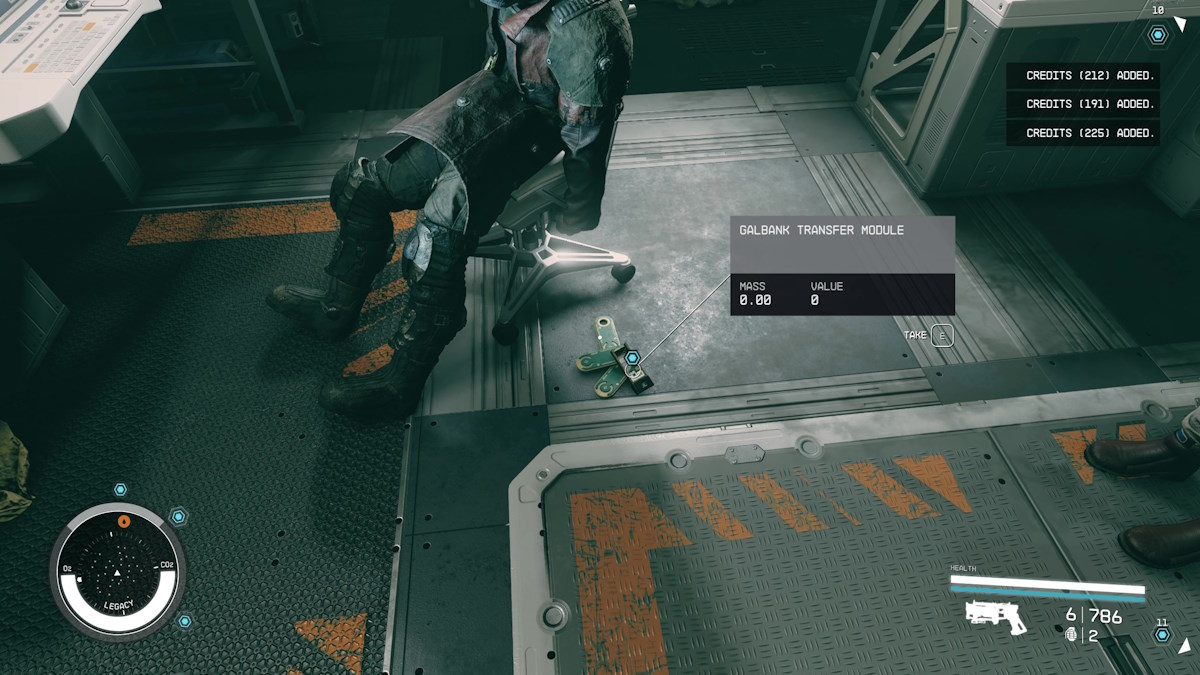
The various audio logs around the room tell the story of how he got trapped on the vessel, which became his tomb. But that won’t happen to you. Pick up the second Transfer Module next to Kryx — and maybe all that sweet cash he left behind. He won’t need it where he’s going. Also, be sure to grab the Kryx’s weapon, Revenant, on the counter. It’s a Legendary Rifle and quite powerful.
Bug alert: Save before you try to complete the Eye of the Storm mission in Starfield
There is a known bug that has stopped players from progressing in Eye of the Storm. Be sure to save you game before continuing from this point.
Once you have both GalBank Transfer Modules, head to the back of the room and activate both Power Override Control panels. Next, return to the control console and insert the two Transfer Modules. Insert the Data Core and, finally, throw the Download Control Switch. If all goes well, the game will tell you to “Wait for the Transfer Process to Complete” and finish after roughly 10 seconds. If it’s stuck on that screen, follow the instructions in the article linked above. Remove the modules and take the hard-won booty.
With the cash in tow, suddenly an electromagnetic surge tears through the ship. It’s time to make like Samus and get out before the thing self-destructs. The ship fills with toxic, orange gas, so you have precious little time to make it back to the ship before things get sketchy. It’ll be fine, though; just keep swimming.
Last step to complete the Eye of the Storm mission in Starfield
At the end of the mission, you must make the ultimate choice: take the money back to the Crimson Fleet or give it to UC SysDef. There are boons and detriments in choosing either/or, but ultimately it means losing the Key shops and the missions from the faction you betray. You’ll still make off with 250,000 credits.
With the decision made, Eye of the Storm is now finished. The next mission is the final one for the questline, leading you to attack the Fleet or UC SysDef based on your chosen alliance.


Published: Sep 18, 2023 5:17 PM UTC