
After surviving being kidnapped by Cthulhu’s weirdo cousins, a prison break aboard a living, flying squid which only brings to mind the Goofy and Pluto conundrum, and fighting literal demons in Hell, you find yourself in the wreckage (corpse?) somewhere along the Sword Coast.
As if trying to offset all of that, Baldur‘s Gate 3 presents players with the classic “Explore the Ruins” quest right off the bat. The Dank Crypt has all of the classic RPG tropes and is well worth your time to complete.
How to pilfer the Dank Crypt in Act 1 of Baldur’s Gate 3
After waking up in the idyllic countryside, gather what comrades you can (Shadowheart, Gale, Astarion, and Lae’zel) before heading toward the ruins housing the Dank Crypt east of the crashed ship. You’re going to need all of the help you can get.
Additionally, remember that reloading a save is a completely viable option (unless you’re doing an Honour run). You’ve paid for the game, it’s entirely single-player, and there is no shame in reloading it if something didn’t go the way you would have liked.
Gaining access to the Dark Crypt in Baldur’s Gate 3
As you approach the former chapel, you’ll spot a party patrolling. Head on up and introduce yourself. No matter which angle you come in from, the various members of the group will alert the leader, Gimblebock, who will then come over and begin your interrogation.
Speaking with Gimblebock has only two outcomes. Passing any of the skill checks will convince him and the crew to run off, whereas failing a check will immediately begin combat.
- I mean no harm – I’m just looking around.
- [PERSUASION] That ship is full of monsters. I wouldn’t go near it. (DC 10)
- [DECEPTION] I think that ship’s an invasion force. Run while you can! (DC 12)
- [INTIMIDATION] The only thing you own is your life. Leave before I take that, too. (DC 10)
- [FIGHTER] Take your best shot – you’ll only get one.
- [WARLOCK] That ship’s full of poisonous vapors. Probably demonic. I’d stay away.
- [STRENGTH] I don’t want to hurt you, but provoke me, and I’ll keep stabbing long after you’re dead. (DC 5)
- I am not competition. I am annihilation.
- Attack.

With Gimblebock and his crew dealt with, you have three different ingress options in the Dank Crypt:
- The first is the main entrance, where a party is gathered and serves as guards for the group inside.
- If you try to open the door at the center of the chapel, you’ll be greeted by another guard, Andorn. You can trick him into opening the door, but he’ll become hostile as soon as you’re inside.
- The second option is breaking the cracked stone floor with the suspended piece of rubble above. If you opt for this, shoot the rope and prepare for a fight when you jump down the hole.
- The second is by lockpicking a hatch (DC 20) along the southern cliff next to the ruins.
- This option skips the entirety of the Dank Crypt and puts you in the final room.
- Finally, you can lockpick the Ancient Door (DC 20), which is situated below the chapel on the western side.
- This will bypass the first section of the Dank Crypt.
BG3 Dank Crypt – 1st Section
Once inside the Dank Crypt, channel your inner loot goblin and steal everything that isn’t nailed down. Cups, plates, books… take it all and send it to camp, as it’ll make for some good trading fodder later on. With that PSA out of the way, this guide is going to assume you’ve broken through the Cracked Stone and dropped down into the ruins.
As soon as you hit the ground, your party will be in combat. You can make this fight significantly easier by targeting the barrels surrounding your foes in the hallway. As you loot, I recommend lighting the different candles, braziers, etc., as I find it helpful to indicate which rooms and areas have been ransacked.
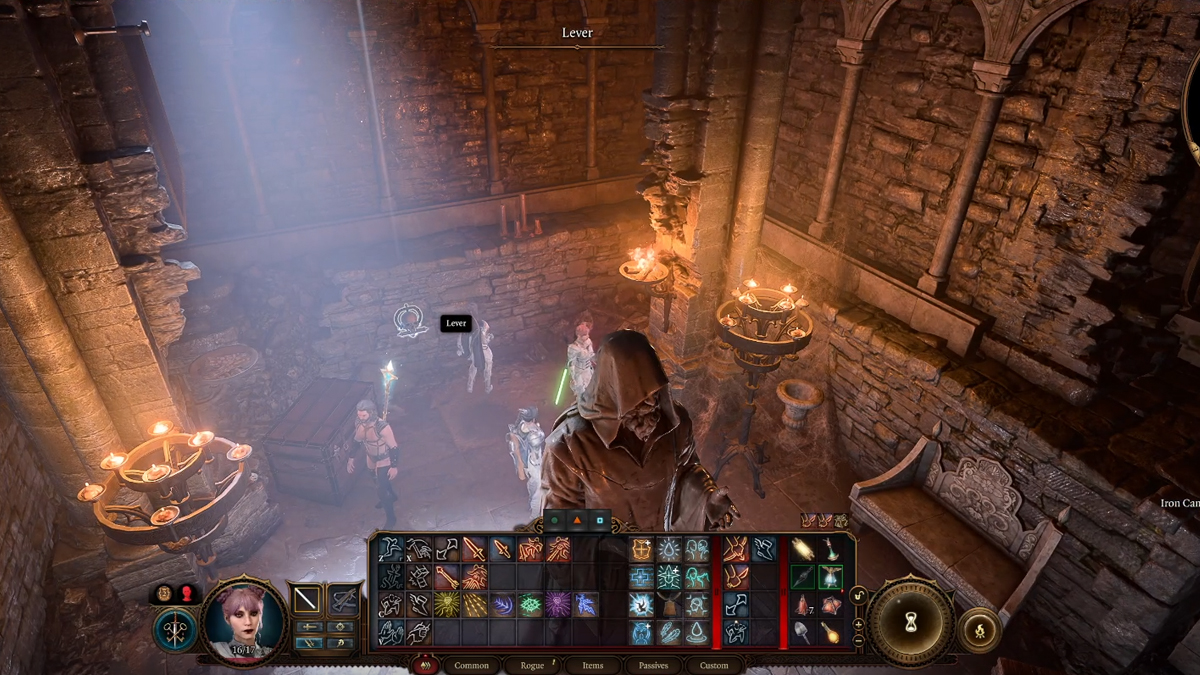
Across the hallway will be a doorway that cannot be lockpicked and has no clear means of entering. Open the door perpendicular to it, loot, and check the area behind the statue. There will be a skull-shaped lever that opens the first locked door.
BG3 Dank Crypt – 2nd Section
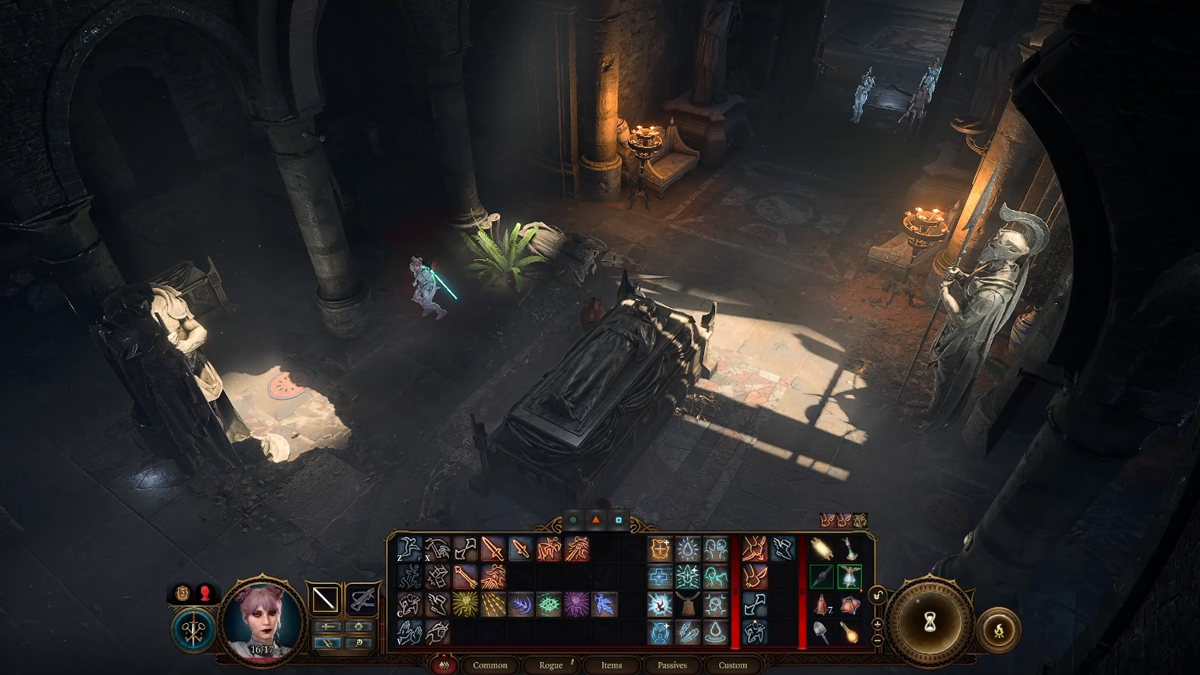
After opening the Heavy Oak doors in the first room of the second section, you’ll enter a room with a sarcophagus in the center. SAVE YOUR GAME BEFORE CONTINUING.
Turn off party grouping and take control of the character with the highest perception and/or trap-disarming ability. There are several poisonous traps on the ground, and a litter of nefarious gargoyle faces on the walls. Use this character to scope out the various traps and disarm them if able. If not, you can place the various vases on top of the vents to block them off.
Opening the sarcophagus will net you an uncommon weapon and an engraved key, but also sets off the traps that haven’t been blocked or disabled. Make sure to loot everything, as there is a Soul Coin in this room that will be valuable later on.
Past this room is another off the main chamber with several other sarcophagi in it. Snoop around for another Soul Coin and the ominous Book of Dead Gods. It can be opened by a Strength, Dexterity, or Intelligence check, and passing a Religion check grants additional insight into this former chapel while also giving Inspiration to Gale and Shadowheart if they’re in your party.
Back in the main chamber will be several skeletal remains. Loot these bad boys and head to the center of the sunken section. On the left side of the central statue will be a button. Pressing it will animate those spooky skeletons and trigger initiative. If you looted them earlier, their attack options are limited, but they’re still plenty deadly.
After dispatching the skeletal sentinels, go back to the button that triggered them and head inside the hidden room. Inside will be a large sarcophagus. Open it to set the ultimate Ride or Die, Withers, free. DO NOT ATTACK HIM. After the brief conversation, Withers will head to your camp, where he offers several services: hiring underlings, reviving dead party members, and respeccing your character.
With the dungeon complete, head to the side of the main chamber with the big hole in the wall and use the lever to activate the ladder. Climb up to be back on that southern cliffside and continue your journey!


Published: Mar 10, 2024 01:00 pm