
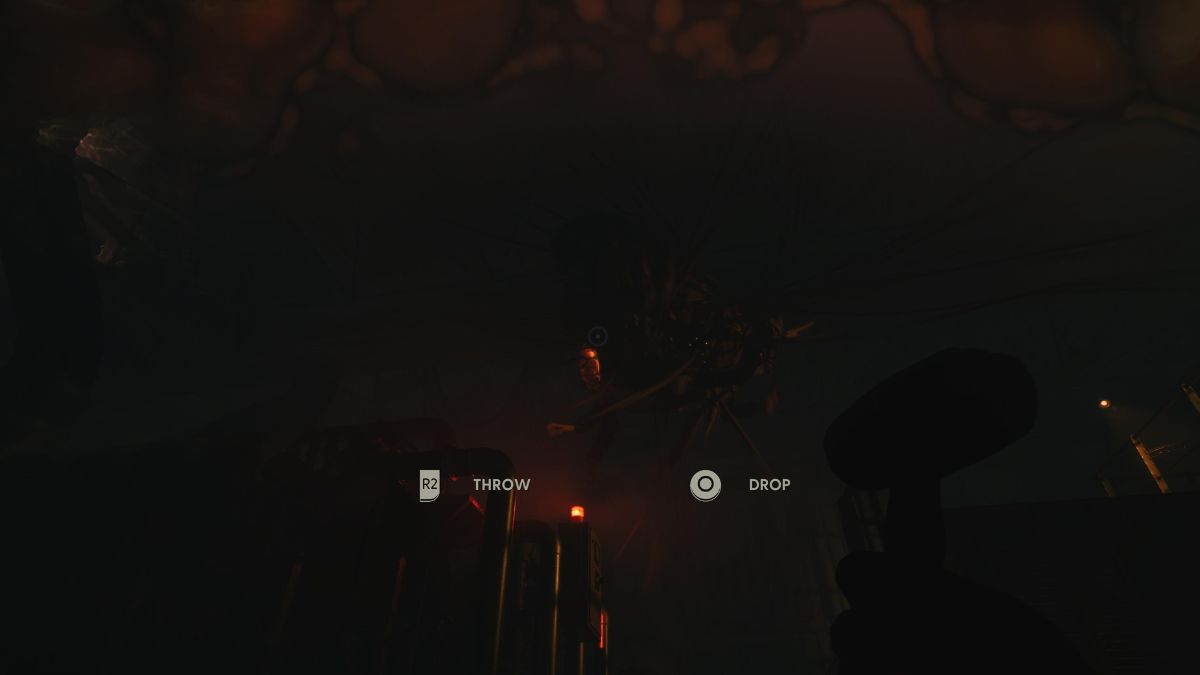
Addair might well be the most stress-inducing enemy in Still Wakes the Deep. He appears exactly when you don’t want him to. When you’ve got a lot of electrical equipment to reset and fix, and the last thing you need is a cosmic monster absorbing you into its fleshy mass.
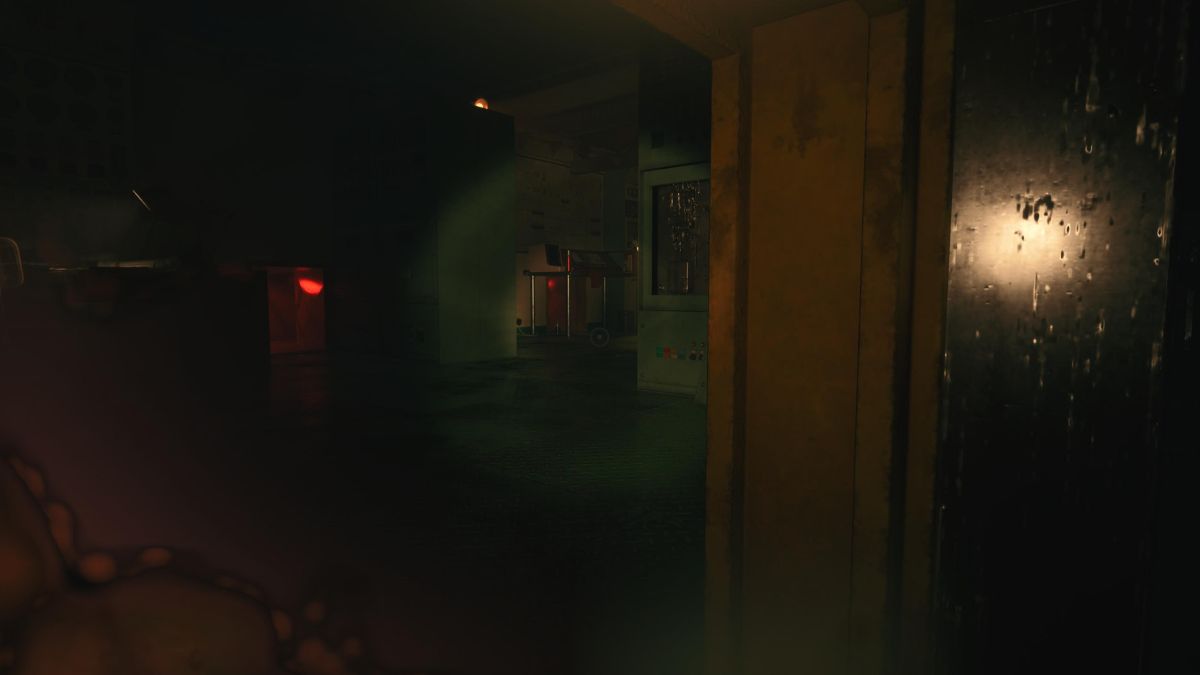
You’ll meet Addair when you’re trying to reset the rig’s protective relay in Still Wakes the Deep. This is a little while after you’ve escaped Rennick, but the crawl spaces around the area should give you an indication that you’re in for a terrible time for the next 10 minutes or so. First, Finlay will point you to a booth with a single switch to flip. Of course, that was never going to be enough, so she directs you to the generator room. It’s a simple enough walk over there, turning off a couple of valves as you go. But that’s when Addair arrives.
How to avoid and escape Addair to reset the protective relay in Still Wakes the Deep
Below, I’ve broken down how you avoid and escape Addair in Still Wakes the Deep from the point that you meet him in the generator room. He arrives as you do, right after Caz points out the hut on the opposite side of the room, which is where you need to go.
Addair moves a lot like Muir. He patrols areas and will react to distractions when you throw objects. Unlike Trots, he’ll head directly to the distraction but returns to patrolling quite quickly, so you’ve got to move fast throughout this encounter.
Step 1: Get to the hut
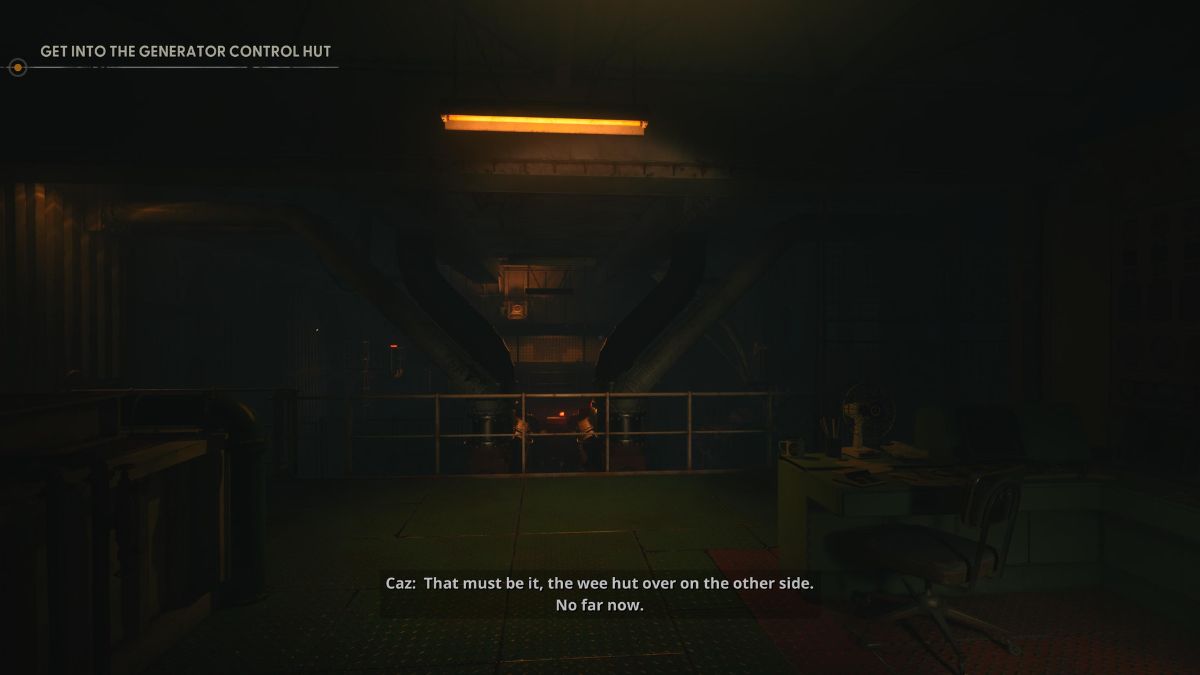
Your first objective is reaching the hut, but Addair makes that impossible without hiding. Head down the steps and then get into one of the crawl spaces. There are some on each side of the room that you can move towards the hut from, but you’ll need to dart into the central crawl spaces too.
The way I did this was to get into a crawl space on the right-hand side, move up a bit, and then wait for Addair to move away before heading to a central crawl space. From there, you can pick up an object, head to the left-hand side, and throw it to distract Addair. This will buy you enough time to move forward again and then hide in a new crawl space, slowly gaining ground.
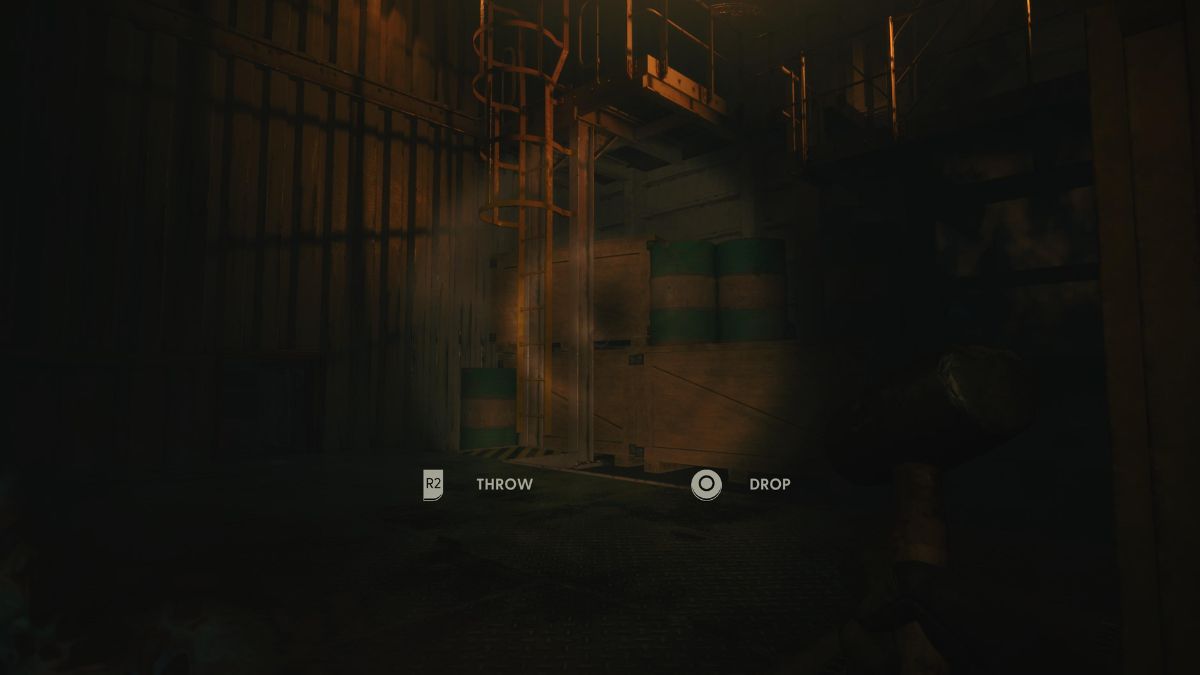
Eventually, you need to be in the central crawl space on the opposite side of the room, facing the exit on the left-hand side, where you can see a ladder. Throw an object on the right-hand side of the room and aim for the back where you first entered this area. This should buy you enough time to climb the ladder and get inside the hut.
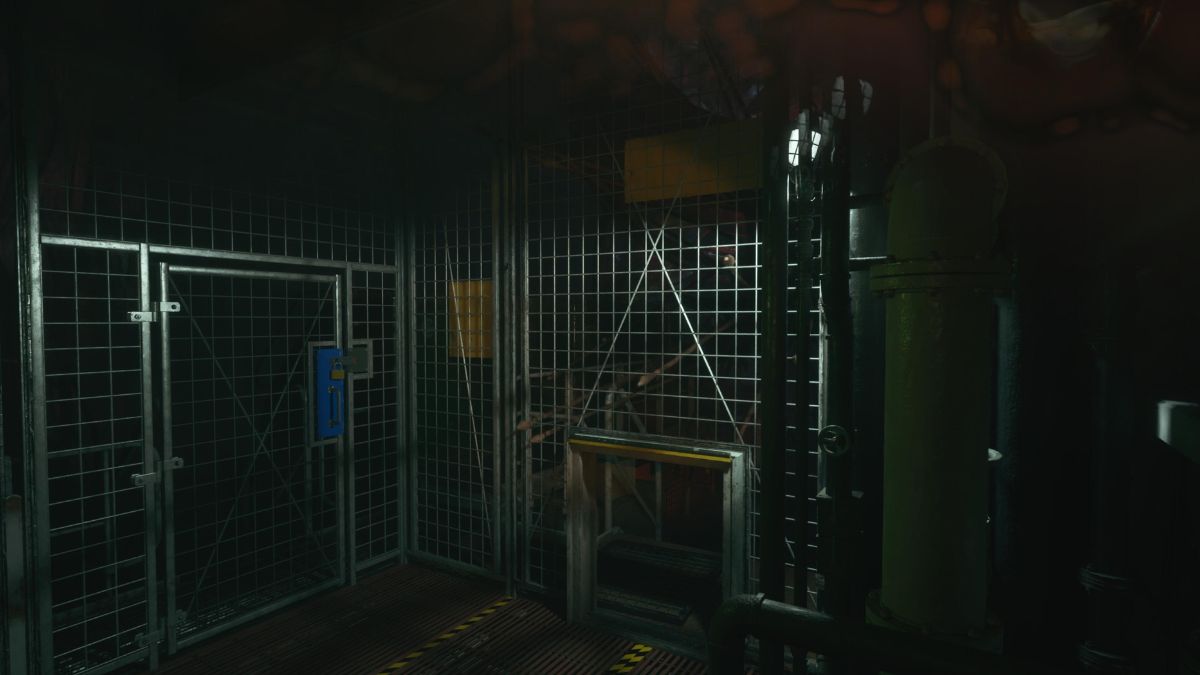
Step 2: Power up the rig modules
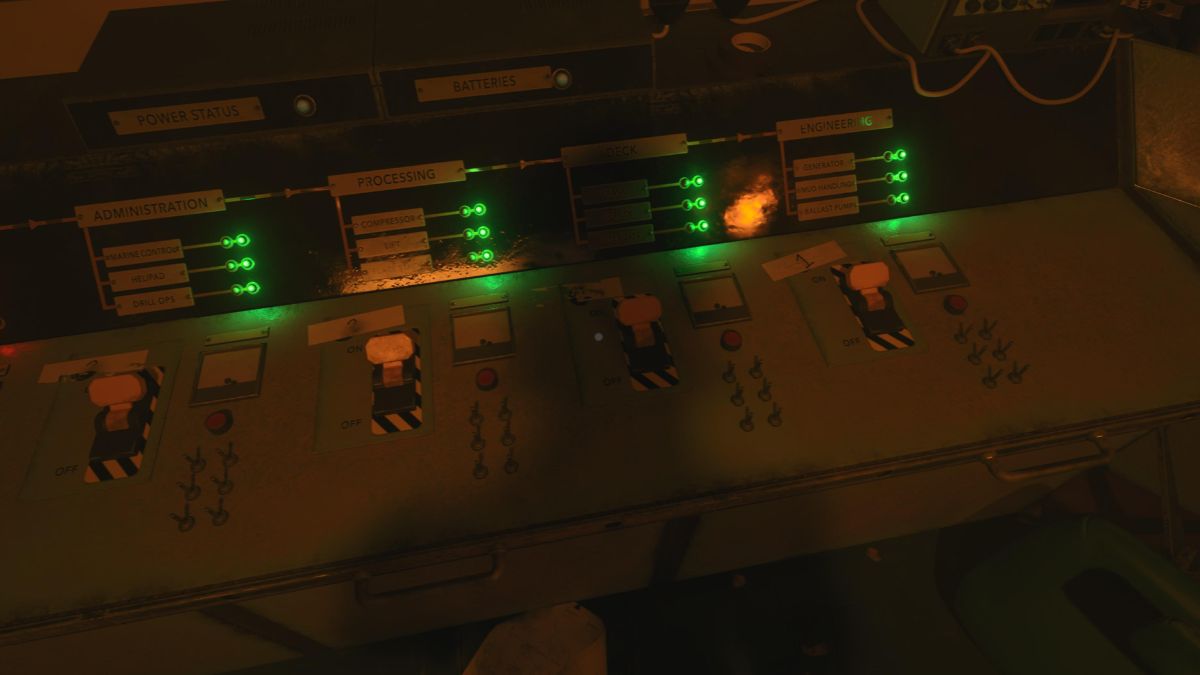
Inside the hut, there’s a little puzzle to solve. You must turn the switches on in the correct order, or they’ll all turn off. The correct order is 1, 2, 3, 4, and 5, but some of the numbers are obscured or missing. However, you can use the correct order below because it refers to the department above each switch. Addair should leave you alone after getting inside the hut, so don’t worry about him for now.
- Engineering
- Processing
- Administration
- Deck
- Accommodation
Step 3: Restart the generator
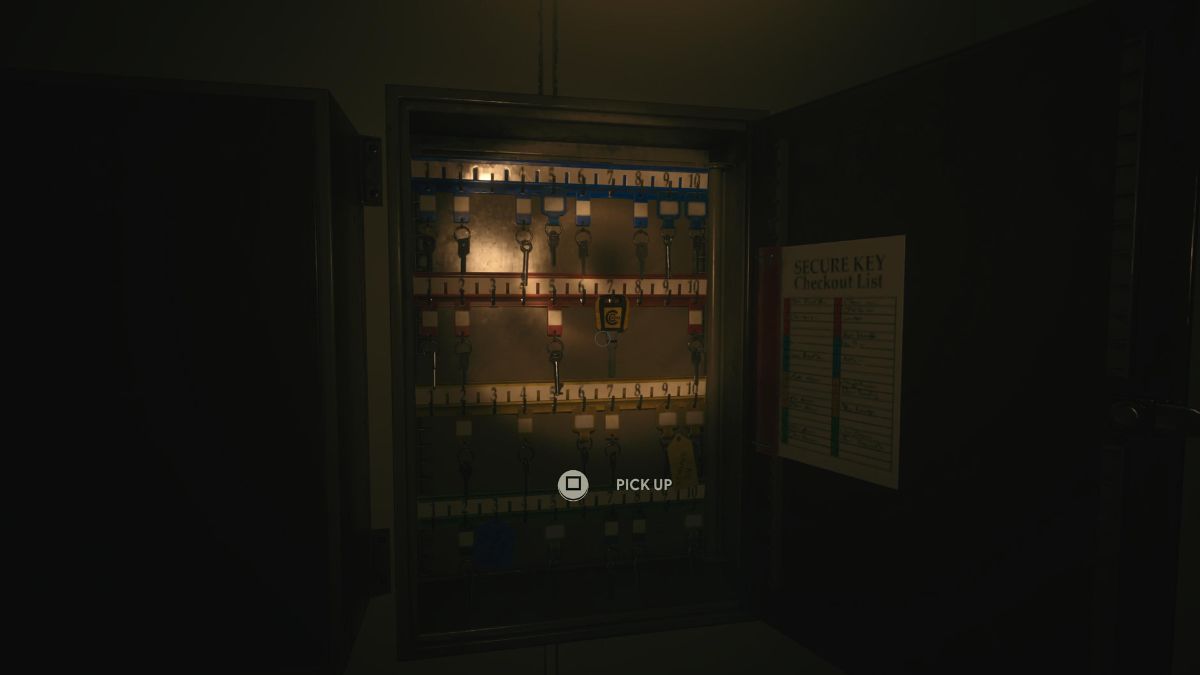
Once all the switches are green, you need to restart the generator. To do this, turn around and grab the key from the cabinet. You can’t leave the hut without it, and I got stuck searching for it in the dark for an embarrassing amount of time.
With key in hand, use the inspection vent to get outside and over to the generator. Use the key to restart the device, but get ready to run and hide. After a brief reprieve, Addair is back and looking for you again. You need to hide and fast to avoid becoming a part of his new fleshy form.
Step 4: Reset the protective relay again
Your final job is to get back to the protective relay and reset it once more. First, you need to get out of the mud handling area and back into the generator room. Climb back up the stairs to the entrance to this area and crawl through the tight spaces, throwing objects to distract Addair as you go to escape.
Addair will pursue you until you hit the point where you can see the glowing tendrils in a crawl space. It’s a long way to go while remaining quiet and unseen, but it’s possible as long as you keep throwing objects to distract him in the main open rooms.
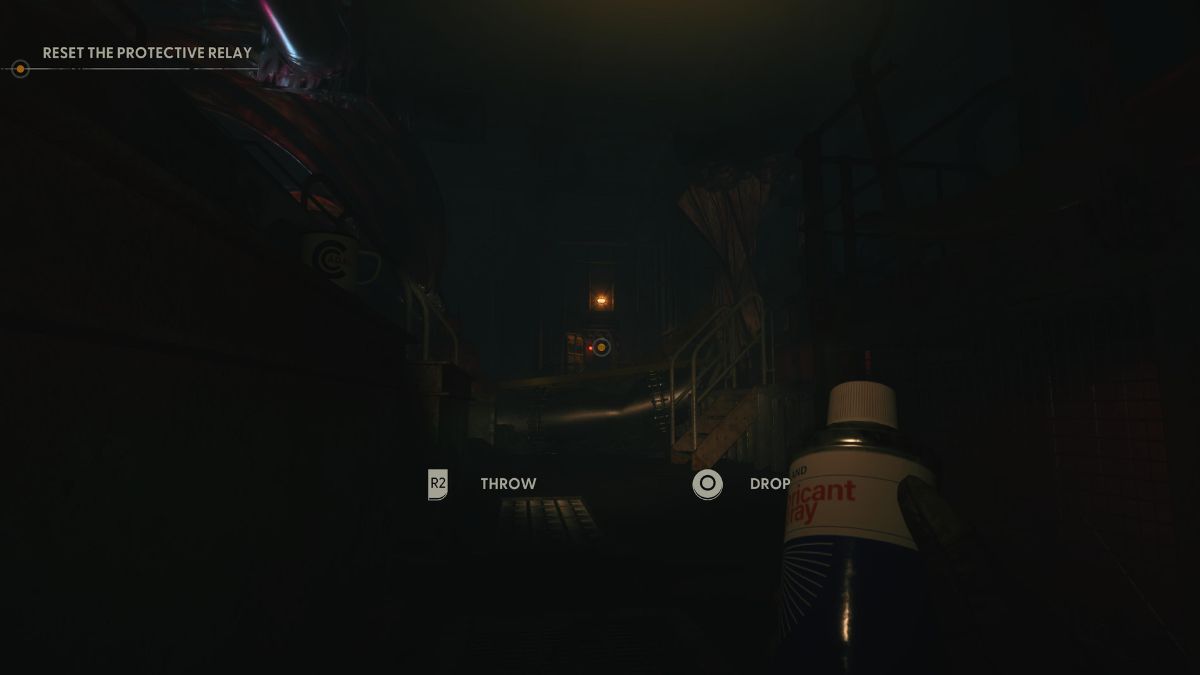
The generator room is the worst of the lot that you must get through. There are two spots that block your paths forward, forcing you into crawl spaces and new pathways where Addair is patrolling. Keep throwing objects and move slowly to avoid him.
I go through this final room by throwing objects to the left-hand side of the room and moving over to the right-hand side. The room you need to get into is on the right-hand side at the end of this space, but it’s got a low entrance you must crawl into.
Don’t get this wrong. Sneak up to the entrance and crawl inside. You don’t want Addair to be chasing you here because you’ll get caught. The cutscene that plays out will show him almost grabbing you, but as long as you’re careful, you’ll be fine.
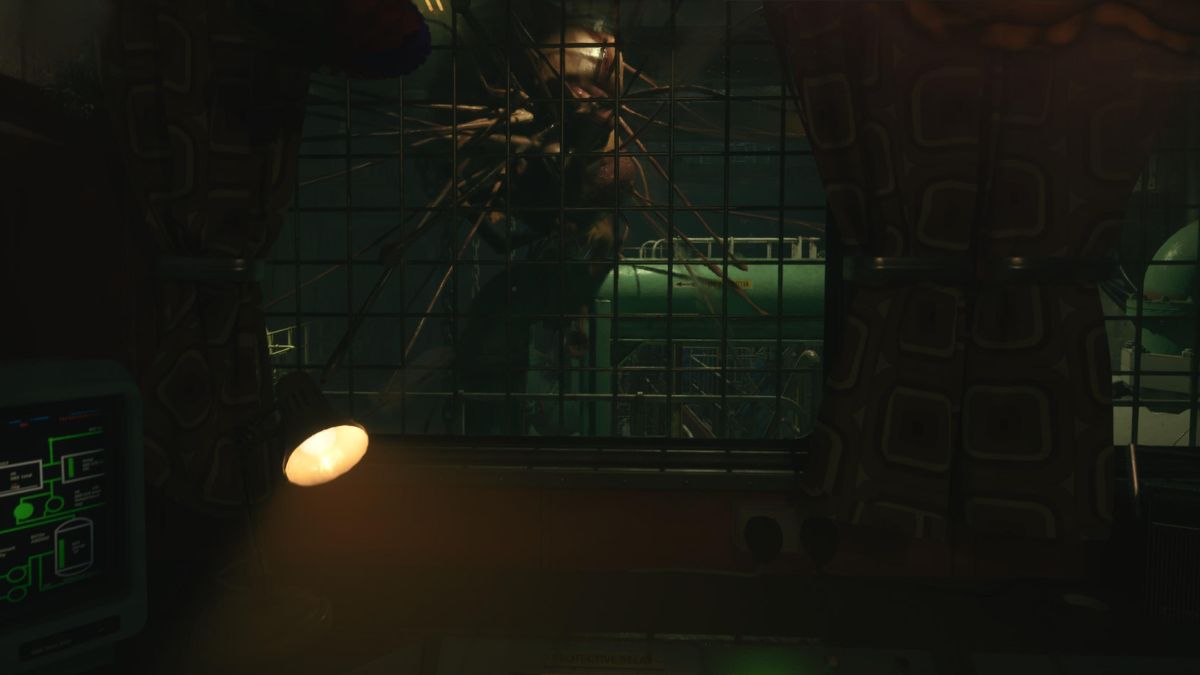
Addair will now beat against the glass to get into the room, but he can’t. Hit the switch to reset the protective relay, and you’ll have completed the main objective. Your next task takes you into the rig’s legs, where all sorts of darkness is leaking in.


Published: Jun 20, 2024 04:43 pm