The world of Miraland is littered with Random Quests to complete in Infinity Nikki, but possibly none are more perplexing than the Forced Perspective line of quests. These will test both your photography skills and your ability to think outside of the box when it comes to the world around you.
Forced Perspective is honestly one of my favorite art forms. When it comes to Forced Perspective photography, it requires the artist to take two visual elements and line them up in such a way as to create a photograph containing an illusion — something that wouldn’t be possible in real life. It’s capturing a moment that doesn’t really exist, even though there’s photographic evidence to the contrary.
If you’re wondering how to unlock and solve all of the Forced Perspective quests in Infinity Nikki, here’s a full guide with everything you need to know.
Table of contents
- How does Forced Perspective work in Infinity Nikki?
- All Forced Perspective quests and solutions in Infinity Nikki
How does Forced Perspective work in Infinity Nikki?
As in real life, Forced Perspective quests in Infinity Nikki require you to capture a shot from a specific angle to create a nonexistent moment captured on film. Let’s use the initial quest as an example, Forced Perspective: Caged Bird.
After picking up this first quest (don’t worry, there’s a map further down), you’ll need to capture a photo of birds in a cage. Except there aren’t any birds in a cage nearby. Instead, there are two bird models near the trellis and a cage situated slightly in front of them:

To get the shot, you’ll need to stand in front of the cage and line up the birds so that they look like they’re in the cage:
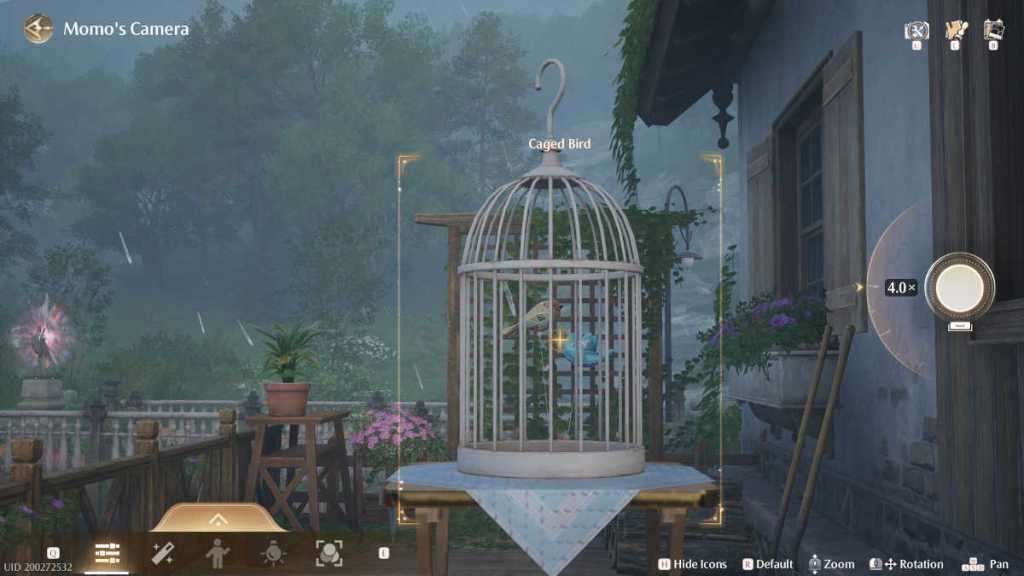
That’s Forced Perspective in a nutshell. The quests aren’t all this simple to complete, but that’s the general idea.
All Forced Perspective quests and solutions in Infinity Nikki
There are a total of eight Forced Perspective quests to complete in Infinity Nikki, with the possibility of more coming in the future. Here’s where to find each one, and what your picture needs to look like. After successfully taking each photo, head back to the quest giver and show them to complete the quest.
If you need a hint, you can enter photo mode and take a look around, the elements that you need to include will be highlighted, even if they’re in the wrong configuration.
Florawish Forced Perspective quests
How to complete Forced Perspective: Caged Bird
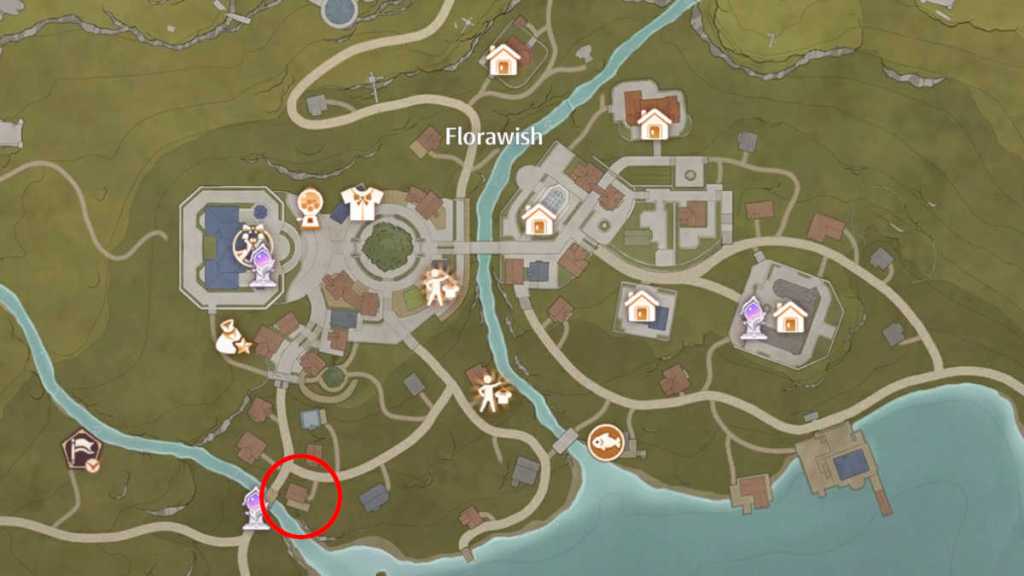
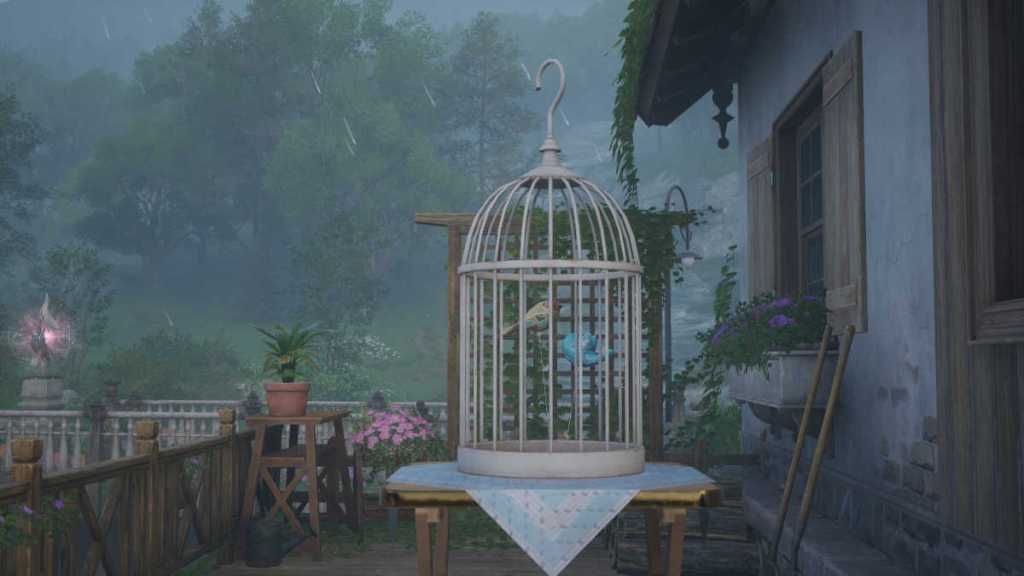
This is the initial quest that must be completed to unlock the rest of the Forced Perspective quests. To find it, head to the south of Florawish and talk to Ginona on the balcony of the house just east of the Florawish Lane Warp Spire. Use the example laid out above to get this one lined up properly.
How to complete Forced Perspective: Capturing the Thief
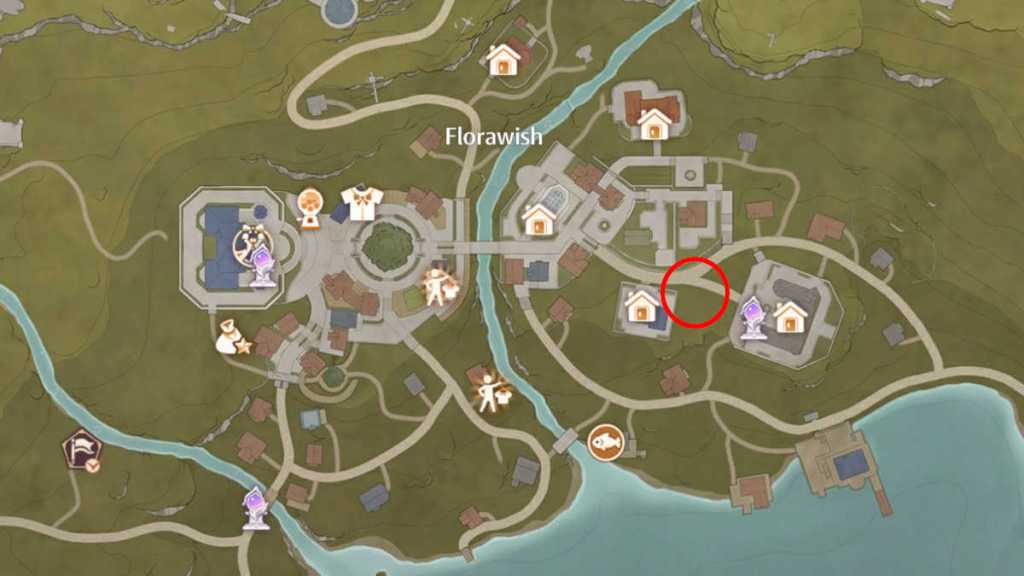
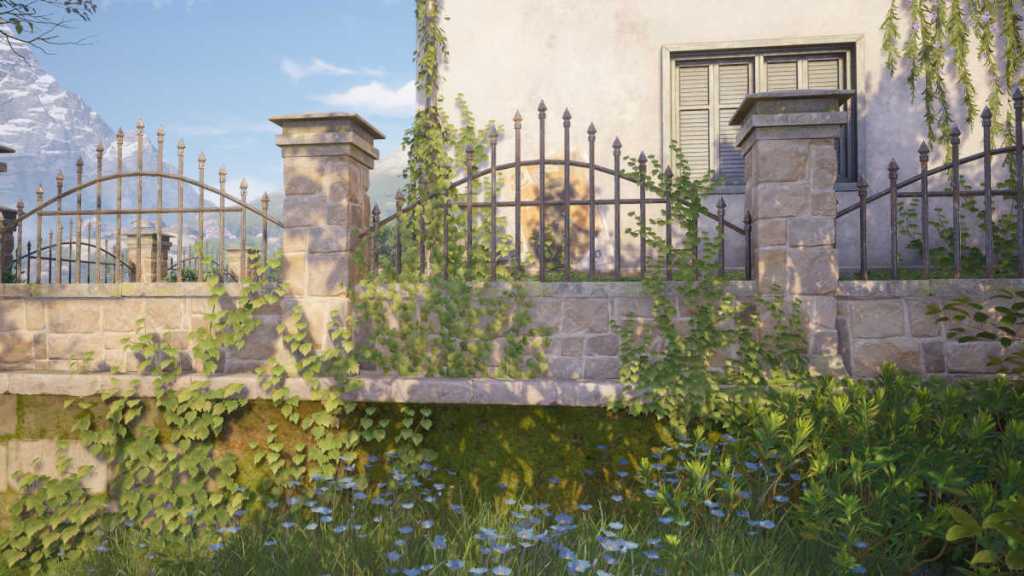
Head for the Warp Spire in front of the Mayor’s Residence, and take the path that goes west to find Toran outside the Kingdom Guards’ Office. After talking to him, head down the southern side of the building and find the poster of a thief on the wall behind the fence. You’ll need to line up the shot so that the poster looks like it’s behind bars, therefore “capturing the thief”.
How to complete Forced Perspective: Ship in a Bottle
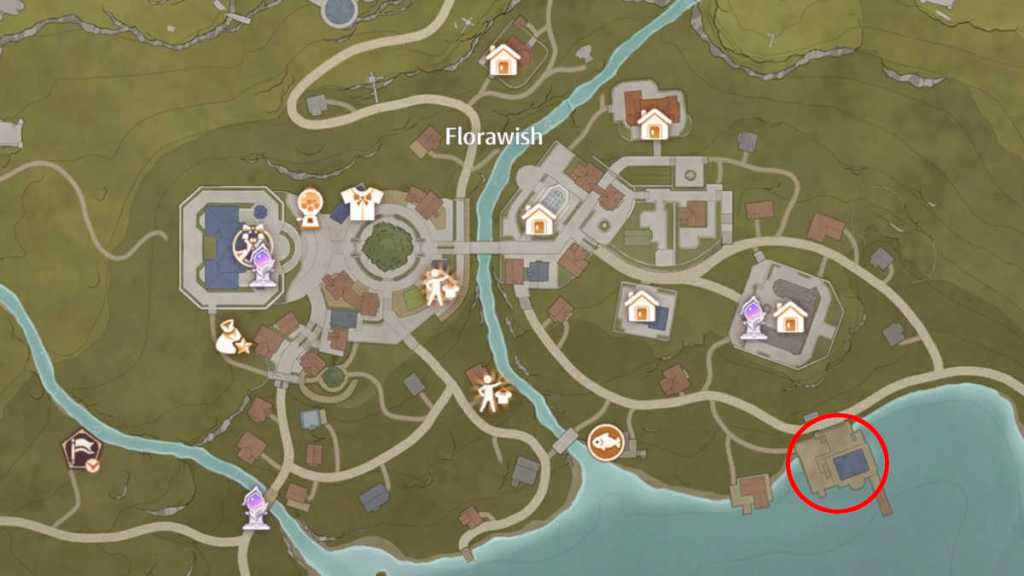
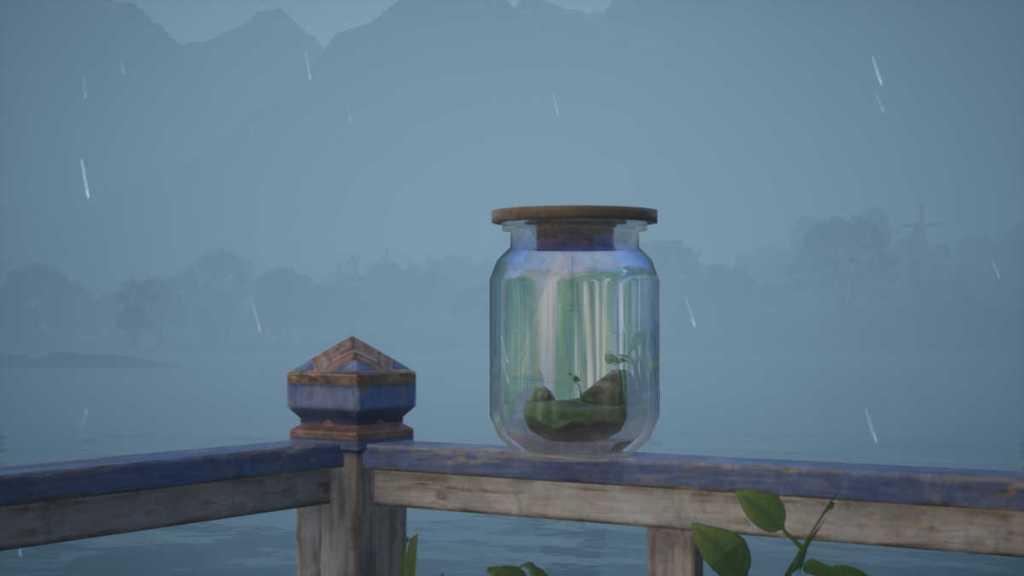
To pick up this quest, go to the Wharf on the southern edge of Florawish town, and up onto the top deck to find Toscani. On the railing behind him, you’ll find a bottle and in the water beyond, there is a sailboat.
Get as close to the bottle as you can, then enter photo mode, angling the shot toward the sailing boat. Solving this one will require you to mess around with the focal length and zoom, but after some fiddling, you’ll get the Forced Perspective shot and be able to return to Toscani to complete the quest.
How to complete Forced Perspective: Flowers in Three Vases
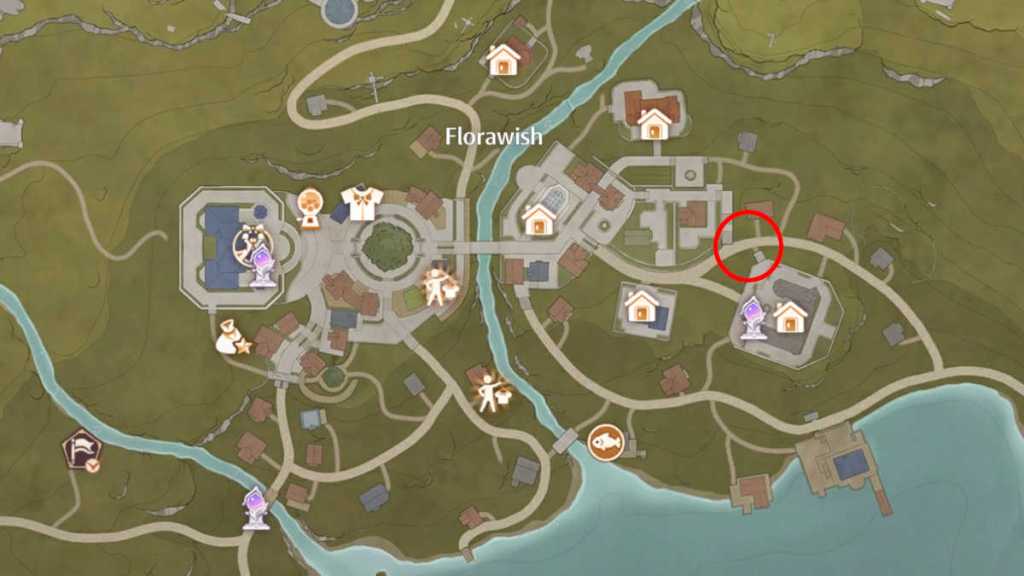
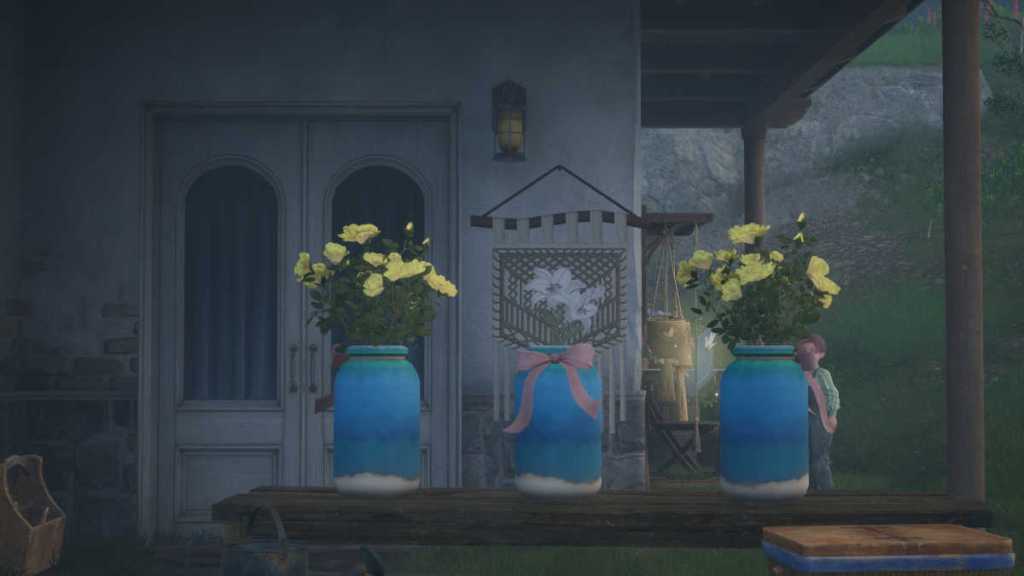
After completing Toscani’s previous quest, he’ll move to the northwest of the Mayor’s Residence. This time he wants to put flowers in three vases, so head to the right side of the house in front of him to find three vases with flowers on the two outside ones, and a floral tapestry on the wall of the house behind them.
Again, this one will need some fiddling around with focal length and zoom, but you’ll end up with a photo similar to mine above, and showing it to Toscani will complete this quest.
Breezy Meadow Forced Perspective quests
How to complete Forced Perspective: Long-Eared Bunny

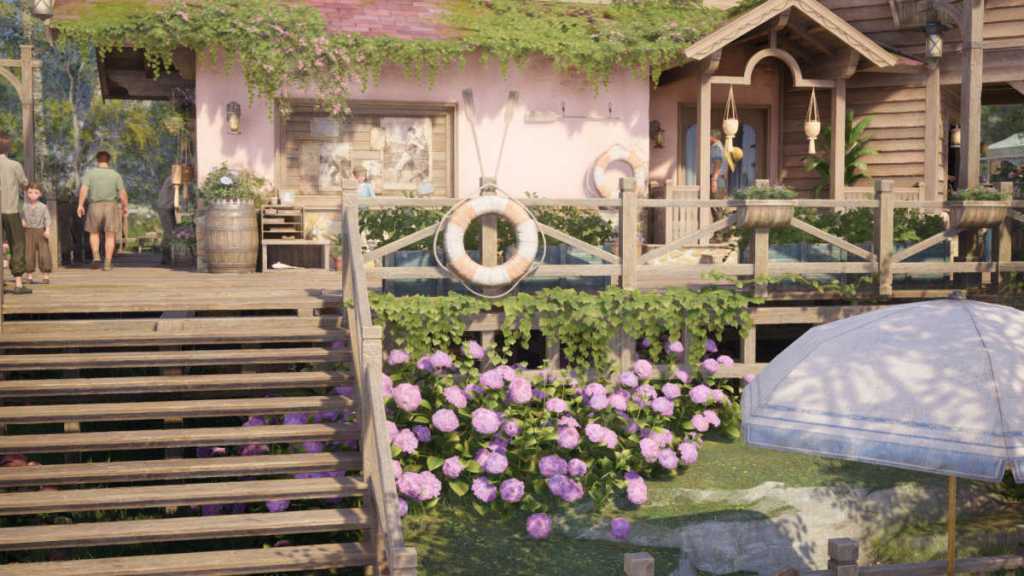
The next Forced Perspective quest can be found at the Fishing Association on the eastern shore of Breezy Meadow, and you’ll need to talk to Qiara when you get there. She wants a shot of a long-eared bunny, except there aren’t any rabbits in sight.
To get this shot, head further down the dock towards the water and look back at the house. The two oars on the wall next to Qiara are the ears that you need, and the swim ring on the railings in front of her makes up the head of the rabbit. Line these up and you’ll get your long-eared bunny to show to Qiara.
How to complete Forced Perspective: Catching a Big Fish
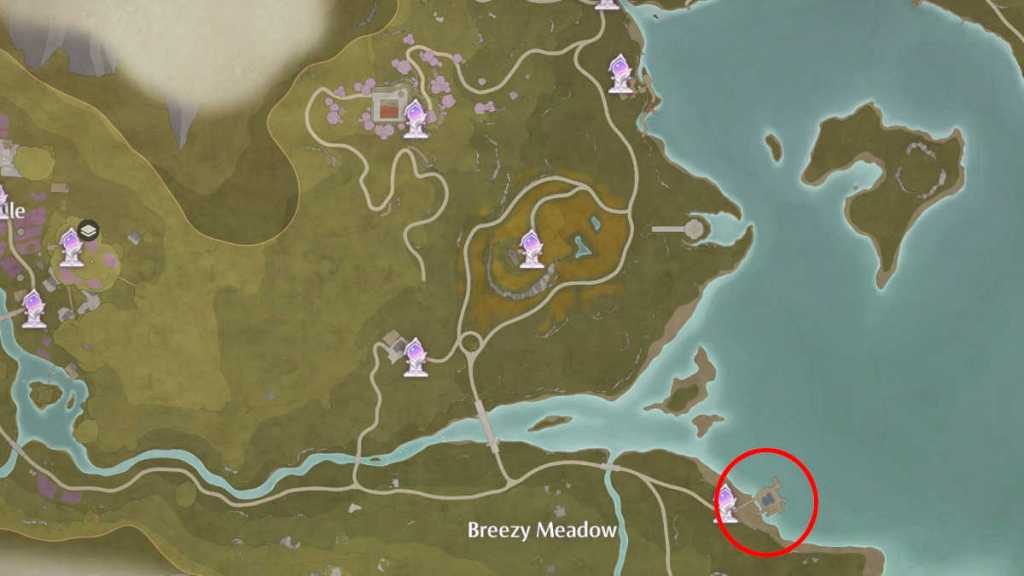
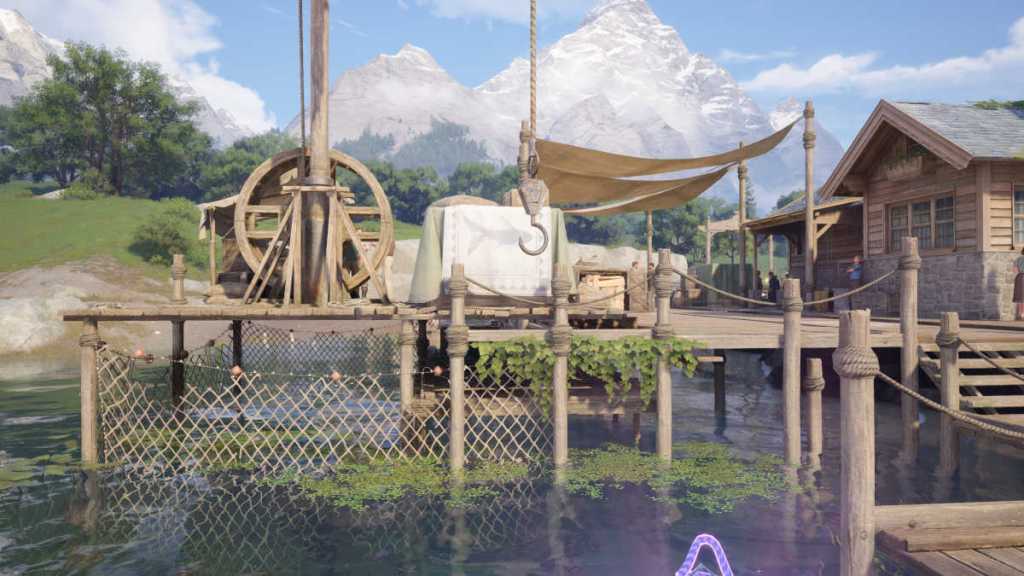
The next Forced Perspective quest is down at Meadow Wharf, so head there and talk to Viliak. He needs a picture of a big fish being caught, but there isn’t anyone around with their rod out.
To get this shot, you’ll need to walk down the pier and jump onto the small rowboat in the water off the southern edge of the dock. Turn back towards the land, and you’ll find a fish hook that’s in front of a small picture of a fish on some fabric draped over some crates. Line these two up and you’ll have your shot!
How to complete Forced Perspective: Light Up the Bridge Lamps

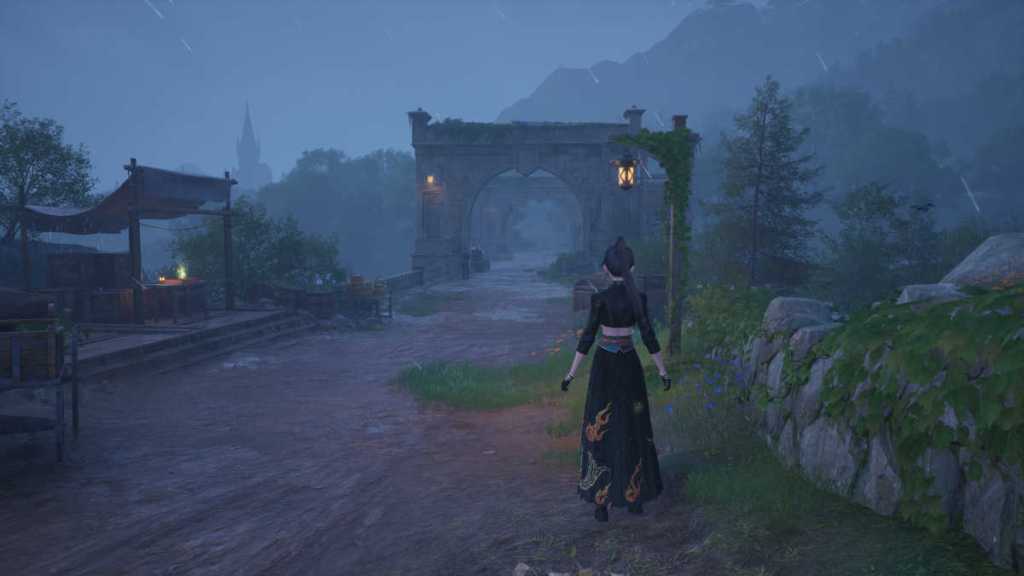
Next up, head to the bridge just southeast of the Meadow Activity Support Center and talk to Tristan, who will only appear after 8 p.m. He wants the lamps on the bridge to be lit, but the right lamp has been broken for a long time, so a forced perspective shot is called for.
To solve this one, head north up the path until you come to a lamppost on the left side. Angle yourself so that the lamppost is between you and the right side of the bridge’s arch, and then enter photo mode. Angle the shot so that both pieces are lined up, and your image should look like mine above. Take the picture, head back to Tristan, and complete this quest.
Stoneville Forced Perspective quests
How to complete Forced Perspective: Flying Buntings
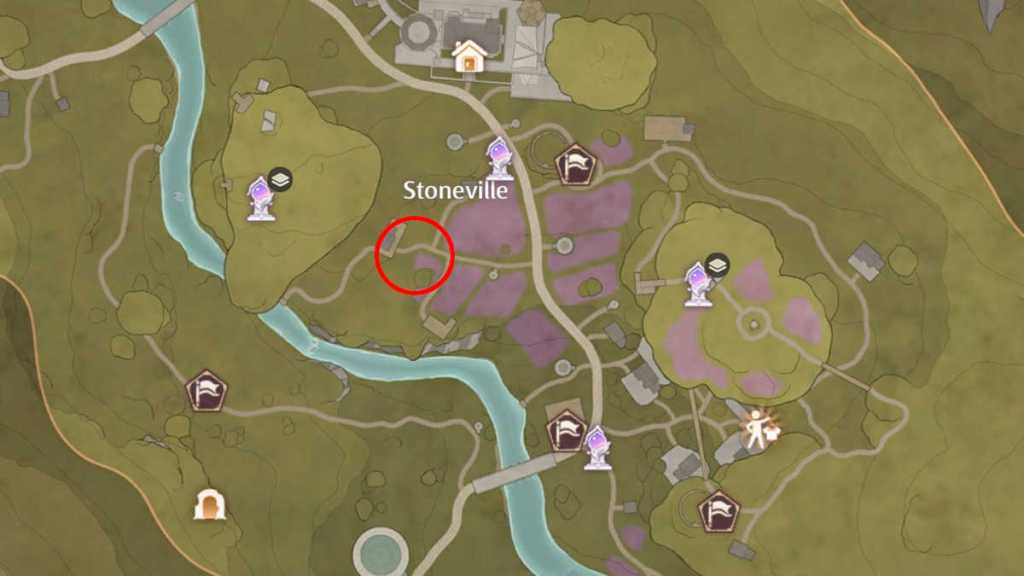
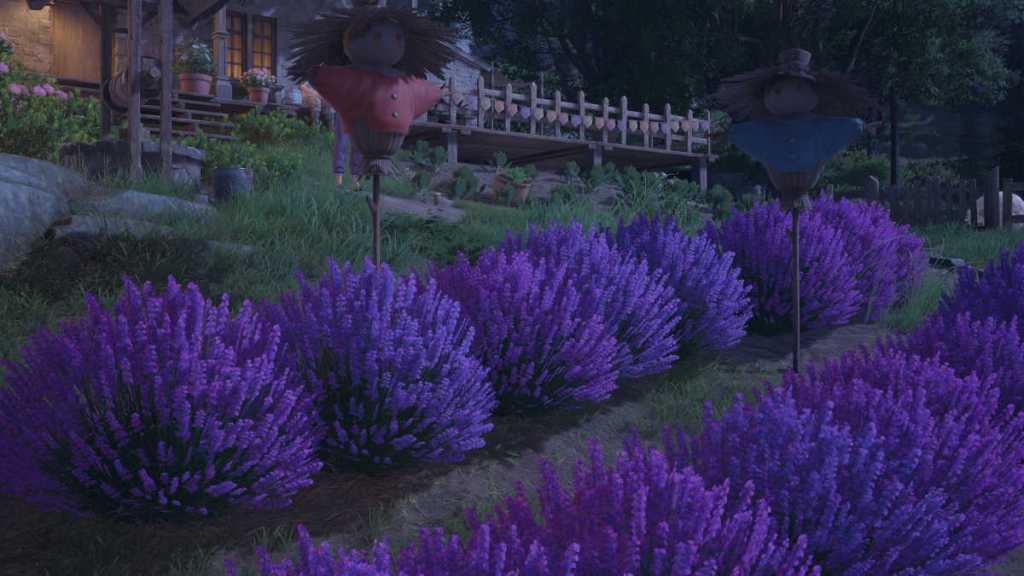
For another Forced Perspective quest, head to Stoneville via the Lavenfield Fringe Warp Spire and head southwest to find Rico.
This one can be a little challenging, but you need to line up your shot so that the scarecrows in front of Rico look like they’re holding the bunting that is hanging from the fence behind him. Move so that the two scarecrows are between you and Rico, then look back at the house and angle the camera so that it looks like the scarecrows are holding the bunting between them.
When you’ve done that, snap the picture and show it to Rico to complete this quest.
Abandoned District Forced Perspective quests
How to complete Forced Perspective: Thuddy Snowman
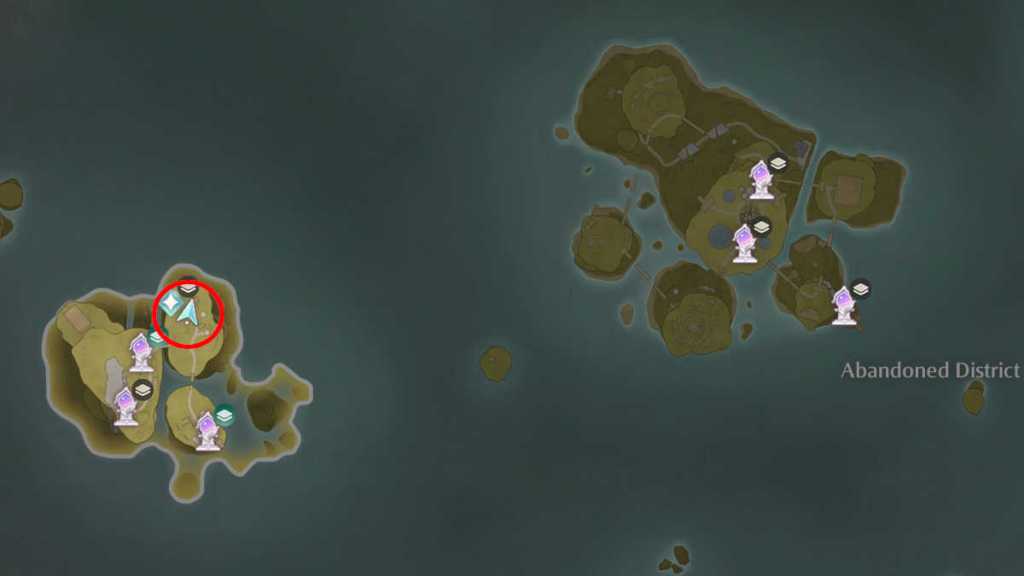
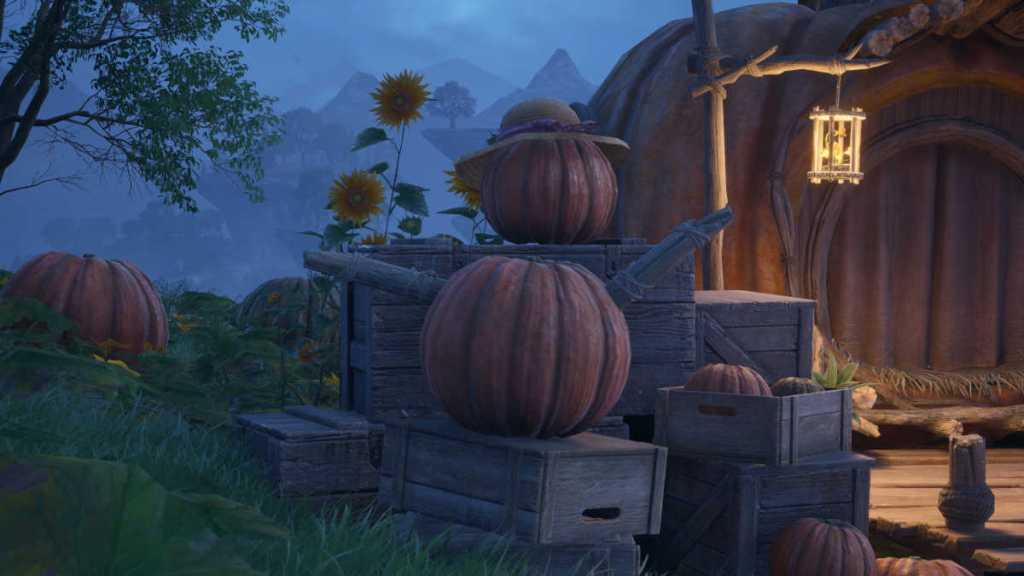
This Forced Perspective quest can be found on Windrider Mill Mid Level, and is given by Sunkissed Stella. You’ll be able to reach this point after restoring all of the Skypasses in the Abandoned District.
To solve this quest, turn to your right and there are two Thuddys outside the giant Thuddy house, with one on a box above another that has sticks for arms. You’ll need to angle the camera upwards from the floor to get the shot, lining he two Thuddys up to look like a snowman.
Wishing Woods Forced Perspective quests
How to complete Forced Perspective: Empty Flowerpot
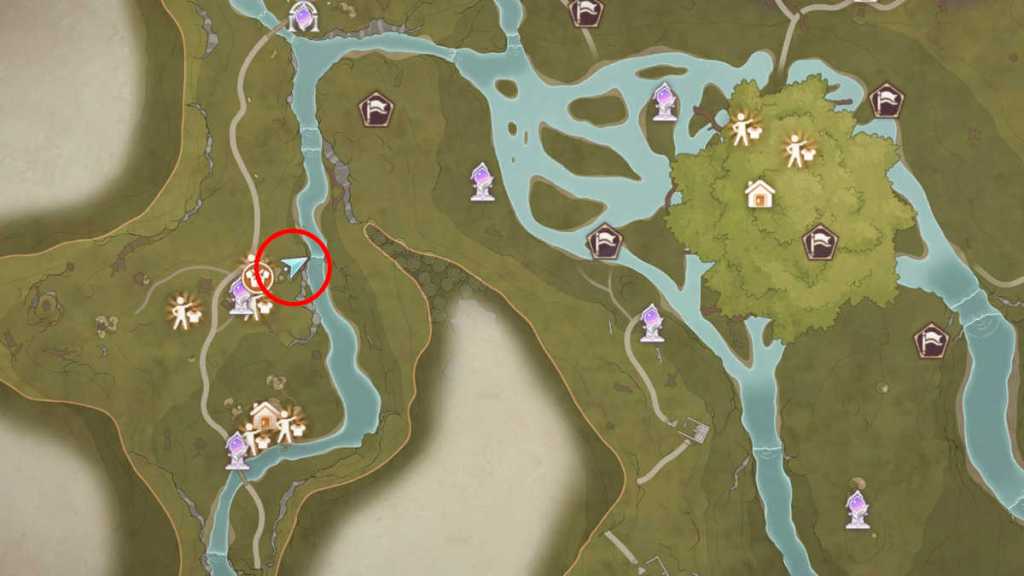
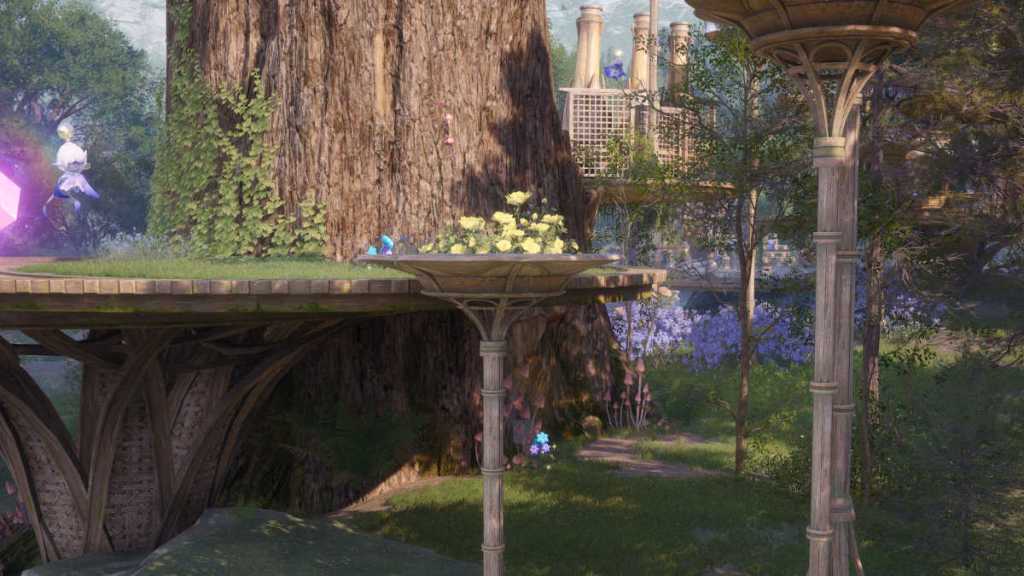
Once you’ve unlocked the Wishing Woods in Chapter 6, you’ll be able to find Sopuda at the location marked above. He’s upset that the flowerpot is empty, and wants you to use Forced Perspective to fill it in.
To do this, jump down to the rock below the platform and look back, angling the camera so that the yellow flowers line up with the empty pot. Take a photo, then show it to Sopuda to complete the quest.
How to complete Forced Perspective: Burning with Anger
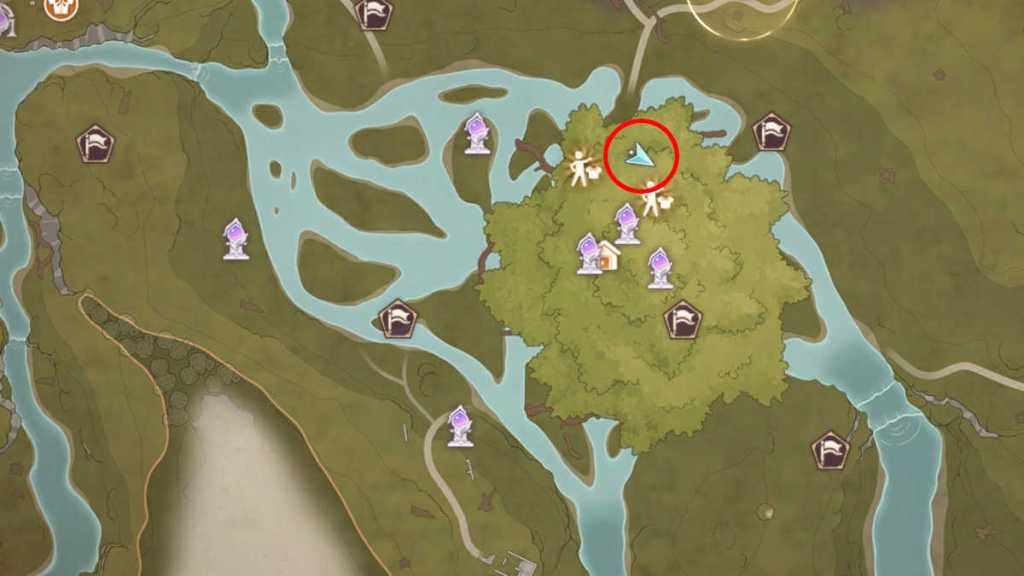
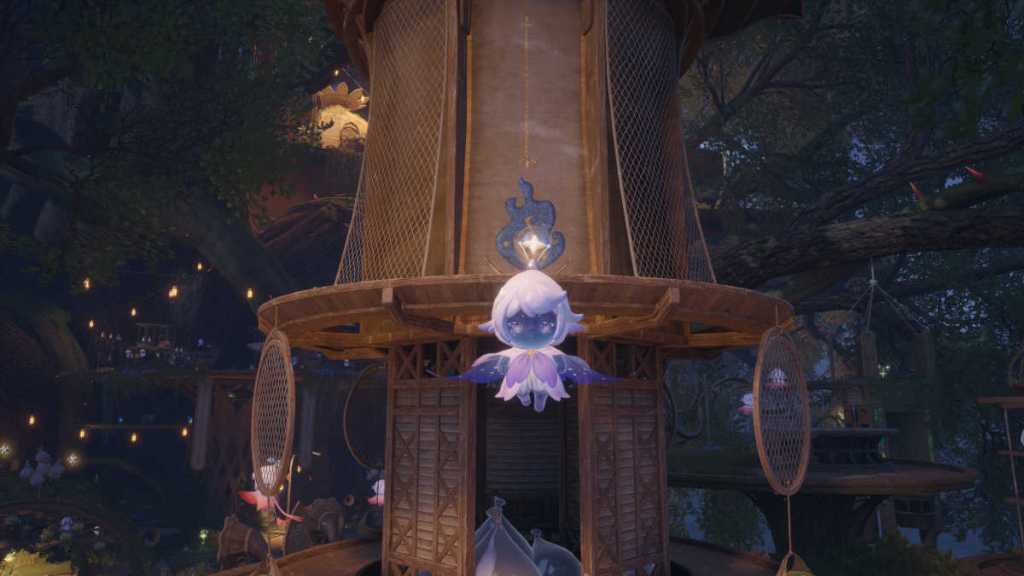
You’ll be able to access this Forced Perspective quest as you progress through Chapter 7 and gain access to the Grand Millewish Tree. On one of the platforms on the north side of the tree, there’s an angry Faewish Sprite named Turaida.
To complete this quest, stand on the edge of the platform and look back towards Turaida, lining him up so that the fire painting on the building lines up with his head decoation, making him look like he’s “burning with anger”. Take the shot and then talk to Turaida again to complete the quest.


Published: Dec 9, 2024 06:31 am