
Grab a steamy cup of Bright Falls Blend coffee, folks, this is the big one. The second Alan chapter of Alan Wake 2, Initiation 2: Casey, takes you from the streets to the subway, and things can get confusing — but our walkthrough and guide should steer you straight.
You enter the chapter smoothly after the previous one ends. The game tosses Alan onto the street in a twisted mirror version of New York City within the Dark Place. Your first order of business? Answer the damn phone.
Collectibles: 16 Words of Power (six in the streets and ten in the subway), two Echoes, and three Writer’s Journey videos. There are no Final Cut changes found so far.
Initiation 2: Casey walkthrough and guide for Alan Wake 2
City Streets: Grab the map and find the light source
The mysterious voice on the phone asks Alan to go to the Caldera Street Station subway. After the call, Alan picks up a subway pass off the floor of a phone booth, a move that flies in the face of even the most basic health warnings. Once you regain control of Alan, immediately grab the Caldera Street Plaza map to the left of the booth.
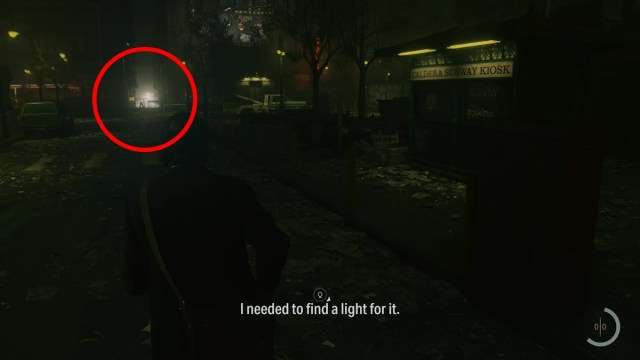
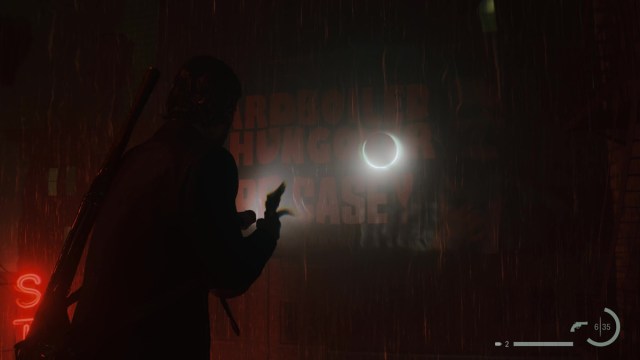
You need to enter the subway, but it requires a light offered by the Angel Lamp. Look to the left from the subway entrance and you’ll see a bright light far off at the end of an alley.
Head in that direction, but be sure to stop by the Vision TV Shop just to the right of the alley entrance for a Writer’s Journey video. Watch the TVs in the shop to unlock the video called ‘Writing’. Remember, you can rewatch any video by activating the TV in the Writer’s Room.
Go down the alley and watch the cutscene with Alex Casey. Once that’s done, go to the end of the alley for a grisly scene. Alan will pick up Casey’s flashlight and gun off the ground, once again violating any health protocol that the streets of New York City should demand. Use the Angle Lamp to take the light.
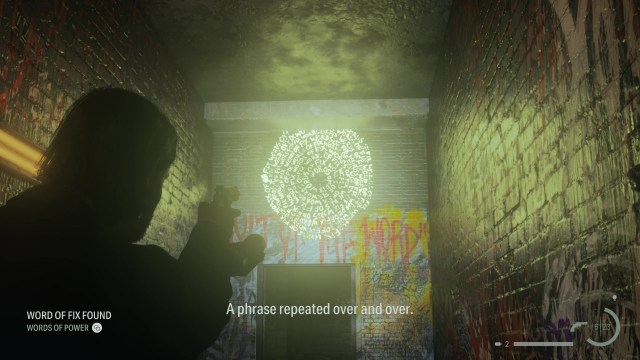
Before you leave, go into the alley to the left of the street lamp to find your first Word of Power — follow the yellow arrows that reflect the light. Use your flashlight to shine a beam on the wall above the final door for a Word of Fix.
Note: For all the Words of Power locations in the Plaza and elsewhere, check out our detailed guide.
To the rooftops to meet a friend (again?)
You may have to fight your way out of the alley. Taken enemies in the Dark Place can be defeated in the same manner as always: Shine a light until the dark shield is gone, then blast them with traditional weapons. The only difference is that, in the Dark Place, some shadows aren’t going to be enemies. You’ll need to keep your guard up at all times.
Once you leave the alley, turn right and walk back to the studio for the next Word of Power — the Word of Fix. You’ll find it to the right of the studio exit behind some trash cans.

Go back to the subway entrance. You can move the light from the Angel Lamp to the street lamp, and that will open the way to the subway. However, you need a second light. Leave and return the light to the Angel Lamp. Glance right while looking at the station entrance to spot another flickering street lamp before the intersection. Go there with the Lamp and activate the light to reveal a staircase leading up.
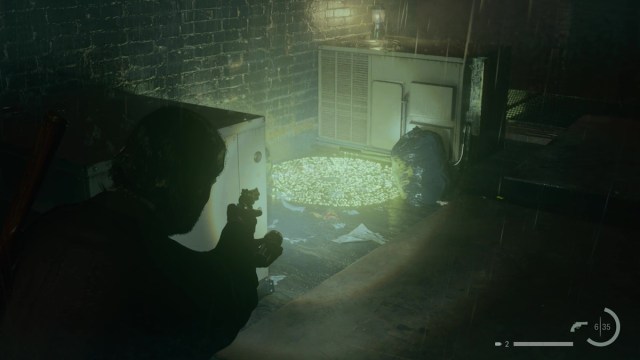
The stairs take you to an elevated rail platform. Traverse the platform, stop onto the roof, and then climb the ladder. Once you’re on the next roof, go right and walk until you reach a cooler on the ground with supplies and another ladder next to it.
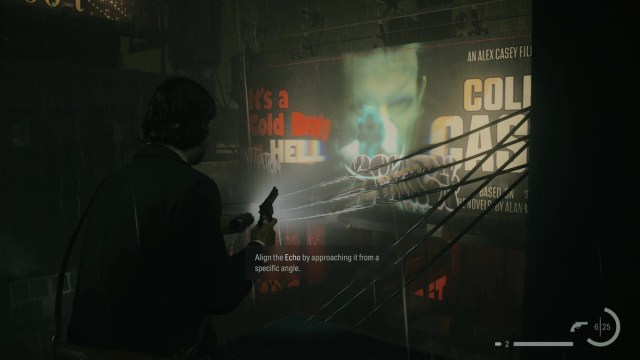
Climb the ladder to find your first Echo. Position the Echo over the Alex Casey billboard to acquire it.
Go back down the ladder and then through the exit door on the roof. The stairs lead you to another roof, where you can find a stash in the corner. To the left of the exit door is a Safe Haven, so use it if you need to save and use the shoebox.
Leave the safe room and take a sharp left. Walk forward, but ignore the stairs leading off into the distance on your right. Keep moving until you hear a humming noise. Follow the stairs upward to meet up with Sheriff Tim Breaker, who’ll let you in on his Mr. Door conspiracy.

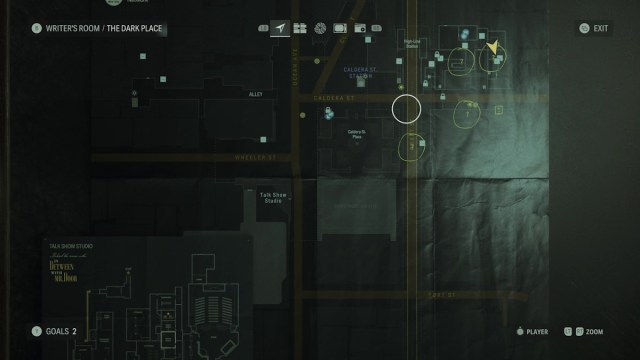
After a brief and weird chat, look to the right and take the map near the wall. The map adds circles with question marks showing the location of each Word of Power in the area, along with Breaker’s stashes — they appear as yellow question marks in boxes. Look for the stashes whenever you’re low on supplies.
The second light and to the subway
Leave Breaker and go back downstairs. Turn left before the safe room and climb the short staircase. At the top of the staircase, look right and shine your flashlight down next to the AC unit to find the Word of Lamp.
Walk across the scaffolding but don’t go through the door yet. Instead, hang a left and go up the staircase to find the next Echo location. Line the Echo up with the Alex Casey billboard across the way. The path to your right will lead to a cooler with some supplies if you need them.
Go back down and through the door to the left of the ladder. It’ll lead you up to… the street, for some reason. Walk under the scaffolding and go up the ladder to the left. Walk forward and turn right to find a small rooftop section with AC units. Follow the painted arrows to find a Word of War.
Back on the street, walk to the cab with blinking headlights. Use the Angel Lamp to take the light from the cab, which turns it into a police car. The move seems to attract some Taken, so get ready for a brief fight. With that done, go up the short stairs leading toward the building and look left. Shine your flashlight high up on the wall to find a Word of Gun.
With the light now in your Lamp, leave the alleyway through the once-locked gated door. Before making your way back to the subway station, take a left toward Grant St. and walk down to find a Word of Action painted onto the bottom of the tracks.

Return to the street light near the staircase leading to the train platform. Take the light and go back to the subway entrance. Open up the entrance and go down below. Use the Angel Lamp in the station to create entry doors. Before you leave, check out the nearby lockers for supplies. If you’re good, then use the subway ticket to open one of the doors and enter the subway. Finally. But we’re just halfway through.
The subway and the Plot Board
After you enter the station platform, the game introduces you to a new feature: The Plot Board. First, activate the Echo, which gives you the Plot Element: ‘Missing FBI Agent’. Go into the Writer’s Room to get the full tutorial on the Plot Board. Simply put, the board allows you to use Plot Elements to alter the ‘Scene’, aka the area you’re in.
It’s mostly used to create new pathways, allowing you to progress further in the story. New Plot Elements are discovered via specific Echoes, but not all are helpful. You need to choose the correct Plot Element needed to further Alan’s story.

Use ‘Missing FBI Agent’ on the board to significantly change the station platform. The blockade that prevented you from going further is now removed. But before you go, turn around and walk to the end of the platform. Look inside the window of the subway car with your flashlight to acquire a Word of Gun.

Turn back and walk until you reach the blood trail. Pick up the FBI badge on the ground and continue following the bloody footprints down the tunnel. Turn left before the invisible wall and go downstairs. You’ll find yourself in the ‘Main Tunnel’ where all the fun stuff is located. Follow the bloody footprints until you get to the Safe Haven. Use it to save before you go.
To the left of the Safe Haven door is a map to the subway — take it before you continue!

Look across the way from the map. You should see a painted arrow pointing to the right. Follow the instructions to find a Word of Aid.

Walk back toward the Safe Haven but take a sharp left after the subway car. The bloody footprints you were following earlier stopped at a barricade. Go inside the subway car and exit out the back to continue.

After leaving the car, pick up the blood trail once more. Ignore the staircase on the left leading down into a flooded room. We’ll return here later. Move on and take the path on the left to find a new Scene: Collapsed Tunnel. Open the Plot Board and use the Missing FBI Agent element. Activate the new Echo and watch the scene. Once that’s finished, look right and go through the door back into the Main Tunnel.
Enter the supply room past the rails and look toward the right-hand wall with your flashlight to find the Word of Lamp. There are lockers in the room if you need supplies.

Leave the room and use the Angel Lamp to remove the light from the tunnel. Doing so removes the car blocking the rest of the tunnel. Move forward and activate the Echo to get the new Plot Element: ‘Murder Cult’. Watch out for Taken enemies as you make your way back to the Collapsed Tunnel. You can use ‘Murder Cult’ on the Plot Board to change the scene, but your next stop is back at the flooded stairwell you passed by earlier.

Activate the light in the stairwell to remove the water. Continue onward but be sure to stop by Sheriff Breaker, who is behind the door near the yellow tape after turning left. Grab some supplies if you need them, but don’t leave without acquiring the Word of Power and stash box map against the wall.
Leave the sheriff and continue onward through a door and up some stairs until you reach a Safe Haven. Before going up the ladder in the haven, look left and watch the TV on the desk to acquire the Writer’s Journey video: ‘Murder Sites’.

The Abandoned Station maze
Go up the ladder to find yourself in a new scene: ‘Derailed Train’. The train is blocking your path, so you’ll have to find a Plot Element to remove it. But before you do, turn 180 degrees and walk toward the plywood barriers and scaffolding. Go around the blue board and then under the yellow scaffold. Shine your light on the ceiling above to acquire a Word of War. Return to the Derailed Train.

Once you get back to the Derailed Train scene, open the Plot Board and activate the Murder Cult element. A door across the way from the train car opens. Inside is another echo, and watching it gives you the Plot Element: ‘Torchbearers’. I hope you have a strong stomach for what’s coming next.
Open up the Plot Board in the Derailed Train scene and pick the Torchbearers element. The train car opens up, but you may not be happy that it did. Progress through the train car while thinking happy thoughts. Leave the train and then enter the door in front of you and go down the ladder. Behind the ladder is a small room with painted arrows pointing to some plywood. Shoot the plywood and use your flashlight to acquire the Word of Action behind it.

Leave the room and go down to the exit door. In the next room, shine your light against the far wall to acquire a Word of Fix. It’s scary in that room, so try to avoid going inside.

Go downstairs to find yourself in a slightly flooded series of tunnels. This area can be a little confusing, as you’ll need to move light around to create a pathway. First things first, go left to find a Safe Haven if you need it. Return to the bottom of the stairs and take the light from the area you entered. The area changes, with two gated sections appearing in front of you.

The gated area to the right has a wall on the left part and a light on the ceiling. Take the light and the wall disappears, allowing you to go into the area. A new gate appears on the other side of the area, but we’ll get to that next.

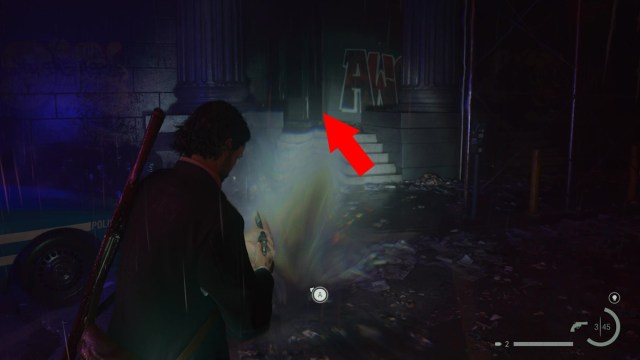
Go inside the darkened area and return the light. This puts the wall back but opens up the section that was barricaded moments before. Press on until you get to the next gate, left of a wall with graffiti that reads “Initiation.” Use the Angel Lamp to return power to the flickering light to remove the blockade next to it.

Return to the last light and use the Angel Lamp again. The wall disappears, and with the blockade removed, you can now progress to the next section of the subway area: Shrine St. Station. Whew.

Shrine St. Station and the final subway Plot Boards
Turn left as soon as you enter the new station. Go down the stairs, but get ready for a possible fight with Taken. Use your flashlight on the wall to acquire a Word of Lamp.

Return to the station and go through the train car. Stop once you exit the car and point your flashlight left to find a Word of Gun painted to the side of the next train car.

Walk through the station, but watch out for Taken enemies. Progress until you get to the next scene: ‘End of the Line’. Pull out the Plot Board. You have two options for elements, but only one progresses the story. The Missing FBI Agent element opens a door to the Information booth next to you. Inside is a tape recorder with what sounds like a message by Agent Nightingale. To move forward, though, pick ‘Murder Cult’ and activate the Echo. You’ll receive a new Plot Element: ‘Summoning Ritual’. Use this new element in the Plot Board and the area will change.
Go back but turn to the right before you get to the train cars. A ramp leads downward toward lightly flooded tracks. You will get attacked here by Taken, so keep your guard up! Walk up the ramp that reads “Cult of the Word” and keep moving until you get to a closed door on the right. Open the door and use your flashlight to get a Word of Action painted on the wall on the other side of the room.

Fight your way out of the room and enter the one over. The Echo in the room isn’t necessary, but it does offer a little bit more flavor. Go to the end of the room and walk up the stairs to your left. To the right is a Safe Haven and behind the gated door next to it is a Word of Fix. This is the final Word of Power in Initiation 2. Congrats on finding all 16!

With that done, go through the door across from the Safe Haven and up the stairs. Go through the door to find yourself back in the Main Tunnel.
Your next stop is back at the Collapsed Tunnel scene. Make sure you acquired every collectible because there won’t be any going back for some time.
Return to the Collapsed Tunnel and use the Summoning Ritual element in the Plot Board. But, oh crap! You’ve pissed off the Dark Presence, which chases you out of the area. Keep running and don’t stop or you’ll die. Go through the train car and into the Safe Haven.

Once Alan hints it’s safe to leave, go back to the Collapsed tunnel. The Dark Presence comes back to chase Alan once more. Run until you make it to the narrow tunnel. After the rocks collapse behind you, move forward until you get to the murder site.
With that, you completed our Initiation 2: Casey chapter of Alan Wake 2. Wasn’t that a treat?


Published: Dec 14, 2023 11:20 pm