
Iun-orok Shrine, along with being one of the harder shrines to say, is also one of the more difficult shrines to find in Tears of the Kingdom. It’s unlikely that most players will come across it naturally, so if you did, way to go, you! We’ve covered how to complete the shrine below. But since it’s so hard to find, let’s go over that first.
How to find Iun-orok Shrine in Tears of the Kingdom
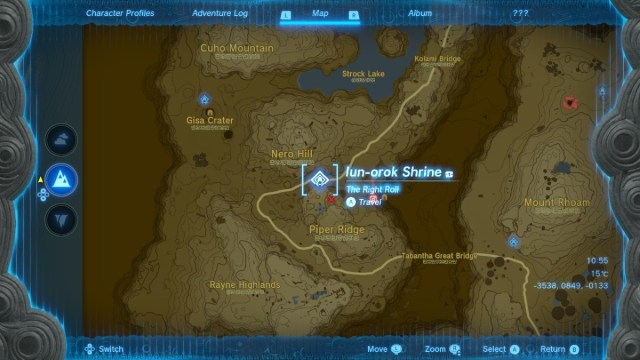
Iun-orok Shrine is located in the Tabantha Frontier region of Hyrule. The closest fast travel point for most players is Lindor’s Brow Skyview Tower. But, if you’ve unlocked Makurukis Shrine, that will get you significantly closer.
Either way, start off by heading towards Tabantha Great Bridge. It’s the wooden bridge that crosses Tanagar Canyon. You can see its precise location in the screenshot above. To get to Iun-orok Shrine, you need to first find the cave where it is located, Tanagar Canyon West Cave.

The cave is at the bottom of the canyon, hence the name, so jump down from the bridge and glide north. You’ll find the cave entrance, pictured in the screenshot above, on the western side of the canyon.
Now for the tricky part. You’ll need to navigate your way through the cave, smashing breakable boulder walls as you go. There are Bomb Flowers to explode the walls and rocks to fuse into weapons littered throughout the cave.
After entering the cave, there’s an area you can drop into that kind of looks like a tomb that Indiana Jones would find himself in. This is the location of the first breakable wall. Bash your way through to the other side.
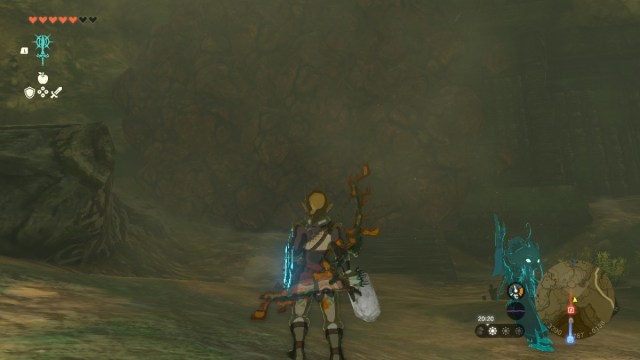
Once you’re through, there are multiple paths available. Head to the right to find another breakable wall protected by an Ice Like. Kill it and then go through the wall behind it.
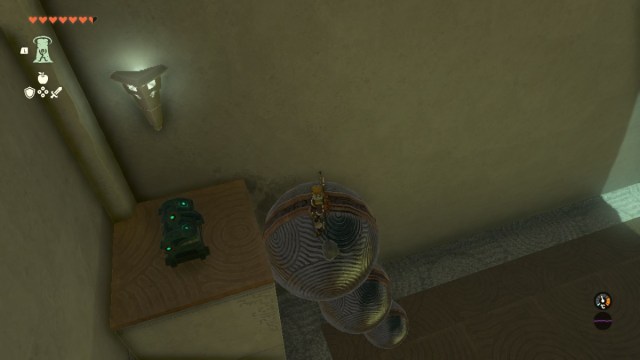
In the next cavern is a Shock Like, a black wall and a brown wall. You need to kill the Shock Like and then bulldoze the brown wall opposite to it. Be careful with the Shock Like. It killed me, at seven hearts, with a single hit of its electric charge. The brown wall will take a few bomb flowers to get through since it is particularly thick. Once you’re through, Iun-orok Shrine awaits.
How to complete Iun-orok Shrine
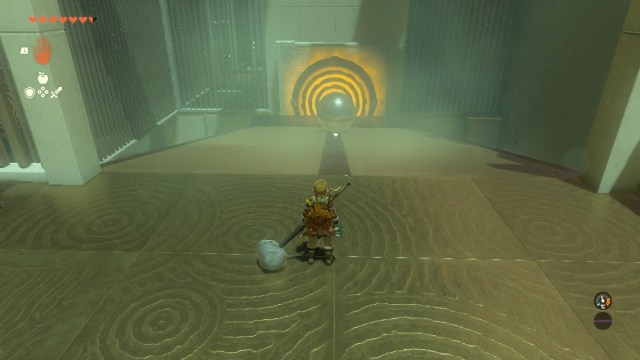
The aim of Iun-orok Shrine is to roll the ball into the target to unlock the door to the next room. It sounds simple, but as with most shrines in Tears of the Kingdom, it gets complicated.
To begin, simply grab the first ball with Ultrahand and roll it down the ramp pretty much however you like, as in the picture above. This is just the teaser room, after all.
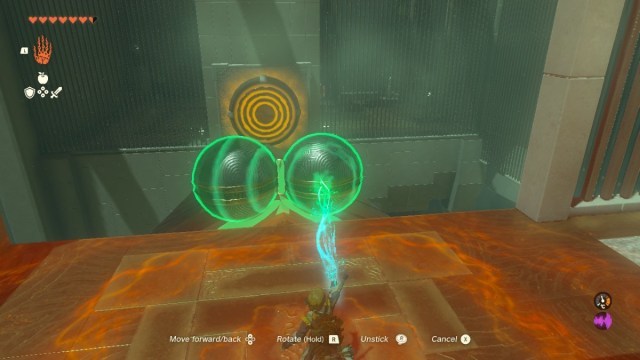
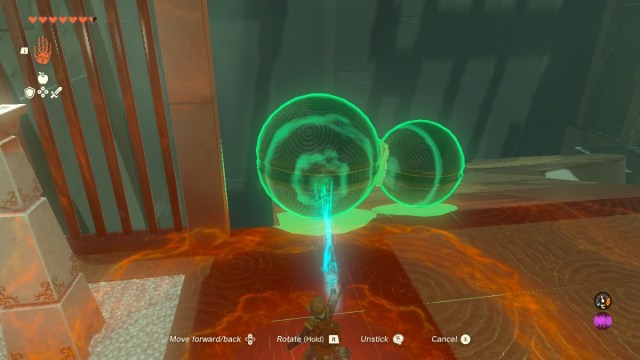
To activate the next target, you can’t just roll the ball down the sloped ramp since it will fall off the sides. Attach the two balls together using Ultrahand so they can roll down at the same time, just like in the picture above.
Before leaving the final room, there’s a chest in the back left corner with a bundle of arrows inside. To get the chest, attach the three balls in size order and lean them up in the corner, like in the picture above. Then, use Ascend to pass through the top ball to access the chest. You can’t use Ultrahand on the chest, so you have to get Link physically up onto the platform.
Now, to activate the final target, you need to roll the balls down the ramp in a way that they will turn toward the target. To do this, you don’t actually need to utilize all of the balls available. Take the two biggest ones and attach them like in the picture above.
When rolling them down the ramp, it’s critical that the smaller ball is on the right so that they turn in that direction. Place the balls as far left as you can at the start of the ramp, and they should turn just enough by the end to activate the target. It might take a couple of attempts, so don’t worry if you miss it. If you fail, the balls will respawn at the start point, so just try again.
Once you hit the target, head down to collect your Light of Blessing and exit the shrine.


Published: Sep 15, 2023 03:43 pm