
Timing is everything
Gasas Shrine isn’t the hardest shrine in Tears of the Kingdom, but it will require more precision than you’d typically expect. This shrine is a fun test of your archery skills while also offering a classic Zelda puzzle set-up to get from point A to point B. Below, we’ll cover everything you need to know to complete Gasas Shrine and obtain that coveted Light of Blessing. But first, let’s take a look at how to find it.
How to find Gasas Shrine in Tears of the Kingdom
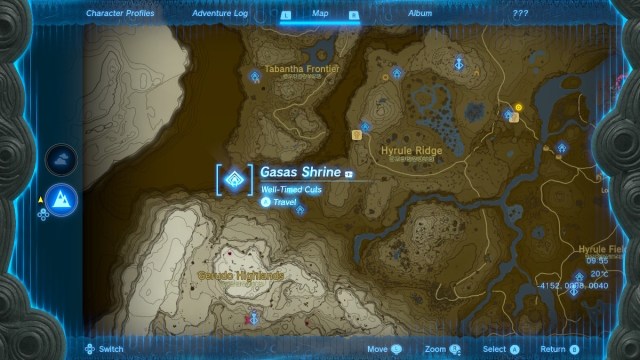
This shrine is located just west of the Tanagar Canyon, in the Tabantha Frontier region of the map. The area is mostly made up of rocky terrain, so boosted stamina can make a world of difference when trying to reach the shrine. However, it’s not necessary for the more patient climbers.
One of the closest fast-travel points to Gasas Shrine is Gerudo Highlands Skyview Tower. It’s best to use the tower and then glide in the shrine’s direction, which is almost directly north. The tower won’t get you all the way there, but it will get you over the majority of the icy Gerudo Highlands, for which you might need some cold-resistant gear. Alternatively, use the Turakawak Shrine fast travel to get even closer. Check out the screenshot above for the shrine’s precise location on the map.
How to complete Gasas Shrine
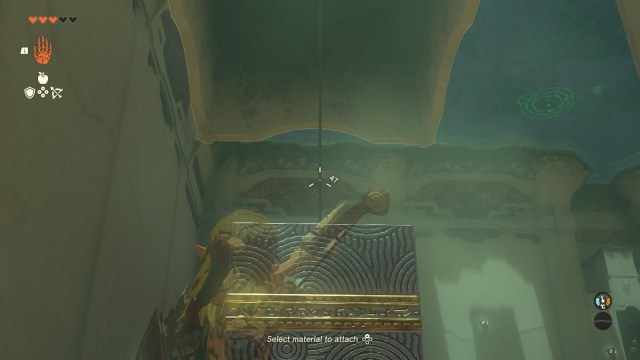
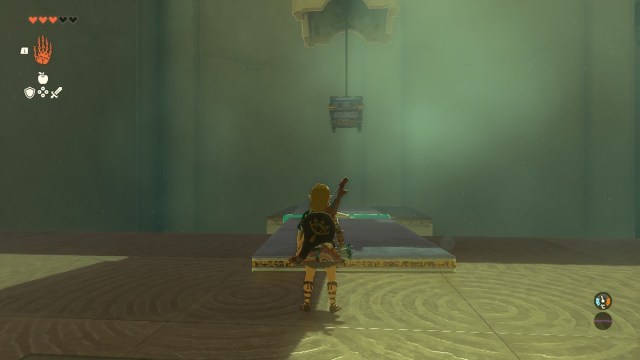
Upon entering Gasas Shrine, you’ll be greeted by a massive stone cube hanging from a very thin rope – I guess Hyrule does not abide by the same health and safety laws that we do.
The trick here is to simply line up your bow and arrow with the rope to cut the cube loose. Once that is done, hop to the cube and then to the other side. If you need arrows, there are two barrels to the left with a bundle each.
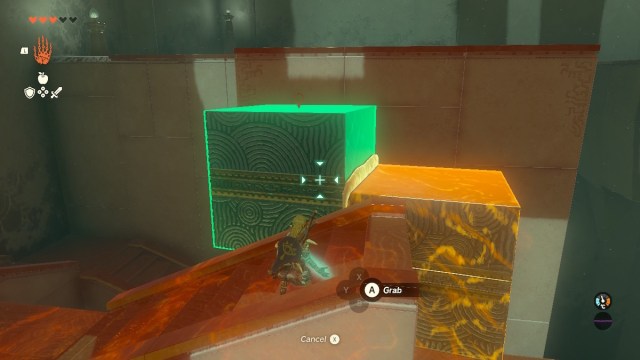
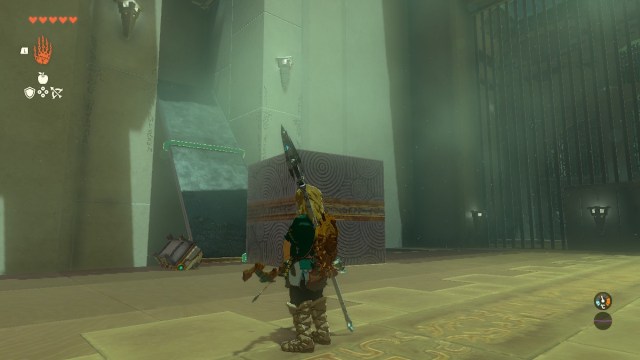
The next area has another stone cube and a high wall. The objective here is to get to the top of the wall, with the catch being that both the wall and the cube cannot be climbed. To do so, use Ultrahand to position the cube so it’s wedged between the wall and the gap in the floor.
Then, use Ultrahand again to grab the cube just behind you from the previous puzzle. Attach it to the cube that is wedged against the wall. However, before attaching it, you need to position it at a height that makes it possible to jump between the cubes and to the top of the wall.
Once you have it in the right position, walk up the stairs and jump from each stone to the wall. Check the screenshot above for the optimum placement.
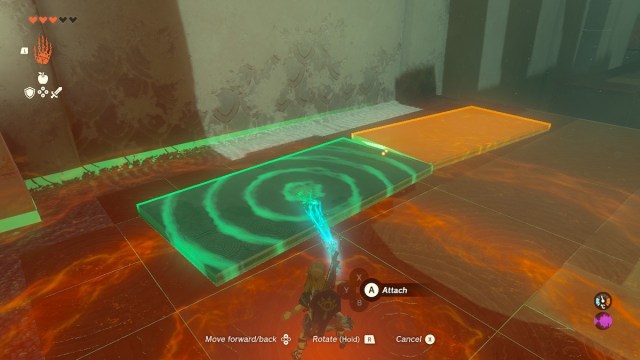
The third section of the shrine is pretty straightforward. All you need to do is use Ultrahand to attach two large planks lengthways, then place them between the gap and head across.
Pick up the attached planks again and place them across the gap to your right. Just above the gap is a hanging chest. When the planks are under the chest, use your bow and arrow to cut the rope. The chest will fall on the plank, and you can claim your prize. In this case, you will receive a Large Zonite Charge.
A second chest is directly opposite the first but high up the wall. Take your platform and the square cube in the corner of the room. Attach them together to form a ramp like in the picture above. Shoot down the chest to receive a small key which opens the small green door. Don’t worry if the chest misses the ramp, it will respawn.
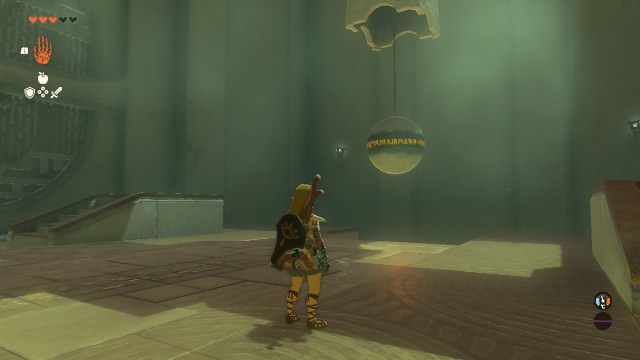
In the next room, you will once again be greeted by a very large object hanging from a tiny rope, but this time it is a large ball. The goal here is to get the ball into an empty hole on the opposite side of the room.
To do this, use Ultrahand to grab the ball and pull it as far up and in the direction of the empty hole as possible. Release it and get your bow and arrow out.
The next part is tricky as it requires you to shoot the rope as the ball is swinging toward the empty hole. It’s best to stand in front of the ball so it is swinging toward you for an easier shot. It might take a few tries to hit the moving target but don’t get discouraged. If the ball starts to slow down, simply use Ultrahand to get it swinging again.
Once the rope is cut, the ball should roll into the hole on its own. However, if it doesn’t, use Ultrahand to grab the ball and place it into the hole. When done, the hole will activate, turn green, and the final door will unlock to your right.
That’s it! Gasas Shrine is complete.


Published: May 29, 2023 04:29 am